DOTA 1 ကို RGC ျဖင့္ online ခုတ္နည္း
ေတြ ့ရင္လဲ ေခၚၾကေနာ္ daweiit နာမည္ နဲ ့ ခုတ္ေနတယ္ :P
1 Client ေဒါင္းရပါမည္ ေဒါင္းရန္ ႏွိပ္ပါ
၀င္ ျပီးတာနဲ ့Download Now ကိုႏွိပ္ပါ
2 မိမိ dota က 2.6 ျဖစ္ေနရမည္ ျပီးေတာ့ မိမိ dota မွာ ေနာက္ဆံုးထြက္ ေျမပံု ရွိေန ရမည္
ေနာက္ဆံု ထြက္ ေျမပံု ေတြ ေဒါင္းရန္ Download
3 အေကာင့္ သစ္ ဖြင့္ ေဆာ့ရမည္ :P
4 က်န္တာ ေအာက္မွာ ဆက္ ေလ့လာ ပါ
အဆင္မေျပပါ က daweiit@gmail.com ကိုေမးျမန္းႏိုင္သည္
RGC အေကာင့္ က အေကာင့္သစ္ စဖြင့္တာနဲ ့ မိမိ ကို အမွတ္ 1500 စေပးပါတယ္
အမွတ္ နဲ ့ ဆိုေတာ့ ကိုယ္ ရဲ့ လက္ရည္ ကို သိရတာေပါ့
တပြဲ ႏိုင္ ရင္ 5 မွတ္ တက္ပါတယ္ ရွံုးရင္လဲ ရွံုး သလို အမွတ္ ႏွဳတ္ပါတယ္
- Intruduction
- Download, install and run "RGC"
- Make account and login into client
- Play your first game
- Knowing client better
Hello everyone, this is tutorial about how to use Ranked Gaming Client
properly. It contains basic info about the things that you need to be
familliar with, in order to play on the client. When you finish reading
this tutorial, you might want to check out Client General Commands. and the Client Access Commands.
- Download "Ranked Gaming Client" latest version from here: Click here!
- Extract files from downloaded content. There is no rule where you must extract files. In case below, I extracted files into "Program Files".
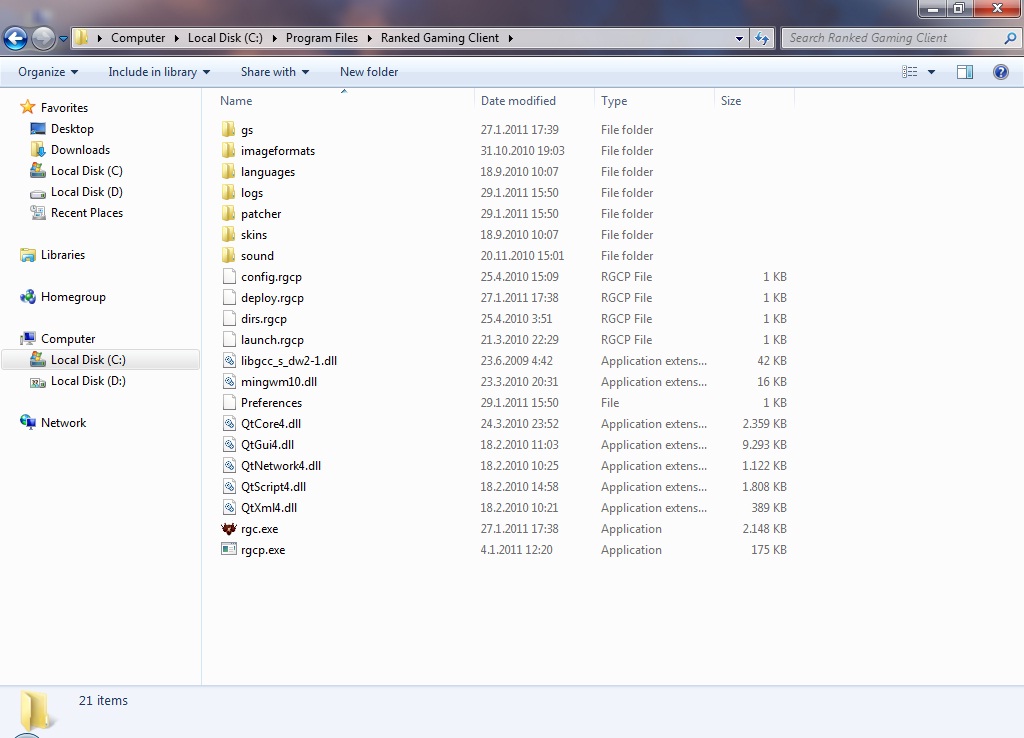 Picture 1. Extracted content
 - Go to extracted "Ranked Gaming Client" folder and run "rgc.exe". If updates are available, patcher will be showed. Update will be automatically downloaded and installed. After that, "Connect" window should pop-up.
Notes:
-If you are using "Windows 7" be sure to run "rgc.exe" as a administrator. If "RGC" fails to update, first run rgcp.exe as a administator.
-If you experience any other problems, bugs, feel free to check our Support Center.
-Your "Connect" window layout could look diffrent because default skin may vary but more about that in upcoming chapters.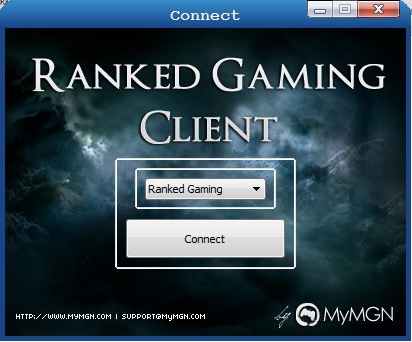 Picture 2. Connect window
- After you click on "Connect" button, "Login" window should pop-up. To make new account click "Register" button.
Notes:
-If you are unable to connect, probably your antivirus is blocking "RGC". So you must put "RGC" on safelist. How to do that
would depend on the antivirus you use.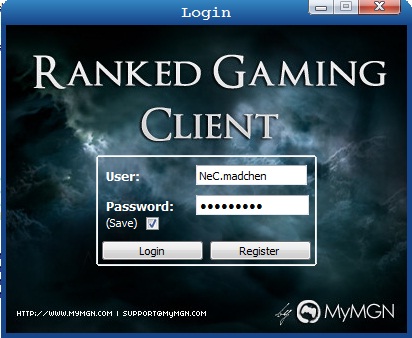 Picture 3. Login window
 - In "Register" window fill all fields with required information and click "Register"
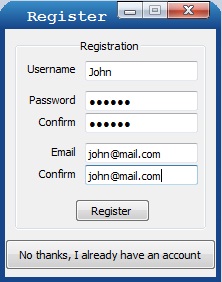 Picture 4. Register window
 - After you finished registration, you will be re-directed back to "Login" window. Enter your user name and password and press "Login" button. If you enter correct information, "RGC" main window should pop-up.
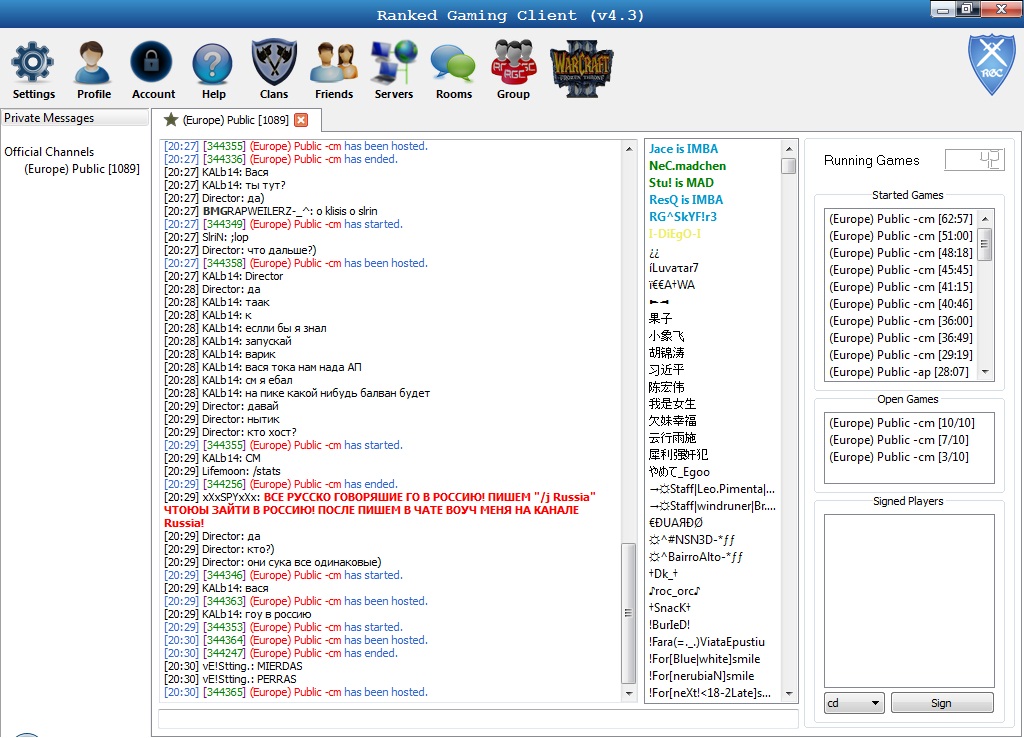 Picture 5. Main window
- First you need to set path to your "Warcraft III:Frozen Throne.exe". To do that click on "Settings" which is located in the upper-left corner of the client. Then click on Dota tab. Click on "Find" and navigate to your "Warcraft III" folder and select "Frozen Throne.exe". In case below i set my path to "D:/Warcraft III/Frozen Throne.exe". Also you can choose default mode. In the end don't forget to save.
Notes:
-Currently "RGC" is supporting "Warcraft III:Frozen Throne" 1.26 version. If you don have it, you won't be able to play.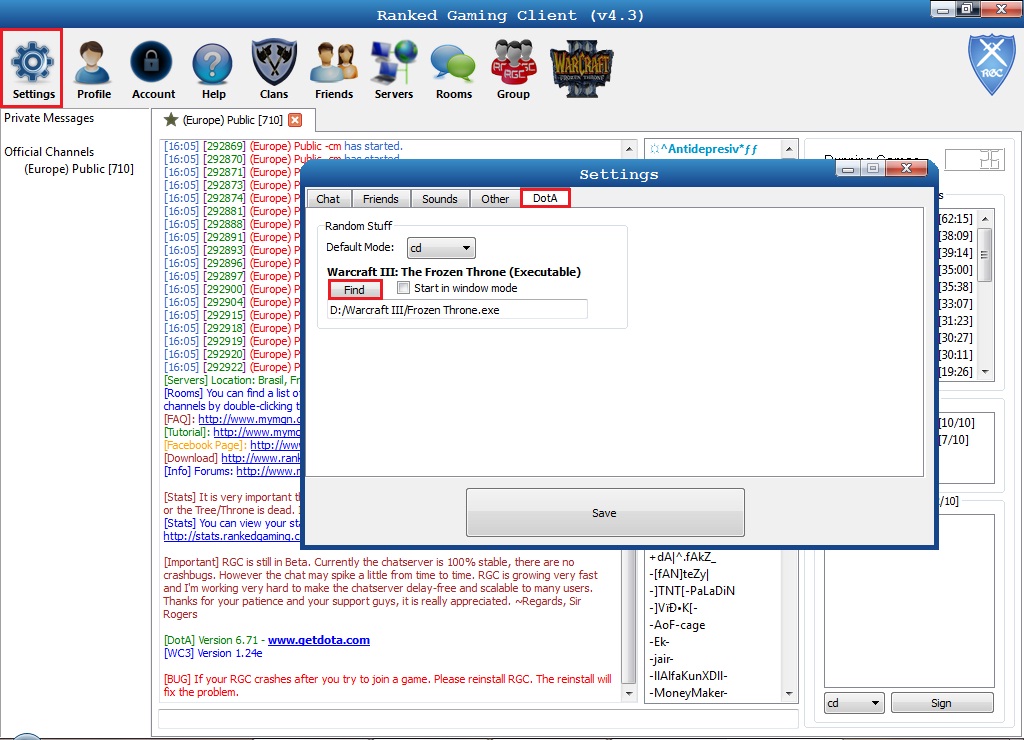 Picutre 6. Setting path
 - Now we are ready to sign for a game. To do that press "Sign" button in the bottom-right corner. Your nick should be added to "Signed players" list. When 10 players are signed you will hear sound "The game has been hosted" and text message on chat too(
 ). Start your "Warcraft III:Frozen Throne" by clicking on last button in a row on the top of the client.
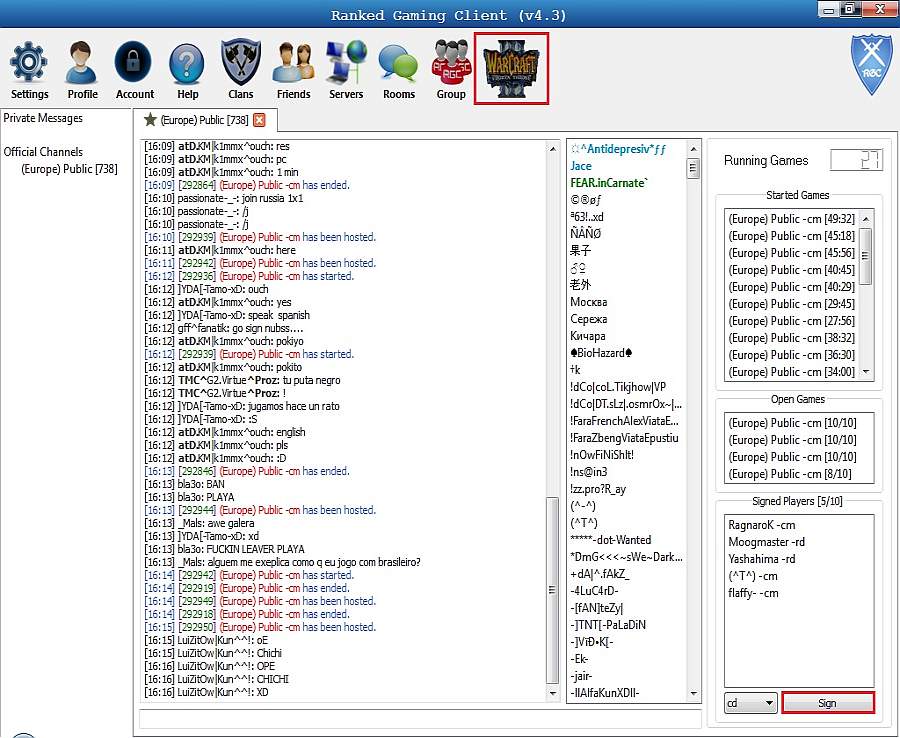 Picutre 7. Sign and run game
 - In "Warcraft III:Frozen Throne" go to "Local Area Network" (
 ) and you will see list of hosted games. The game you signed for would appear blue.
 - Now join a game. Since you are signed for that game, your slot will be reserved for a minute. After a minute, all slot reservation are removed and everyone is able to to enter a hosted game. To make a game start, all players inside game need to type "!ready". As soon as possbile all players type "!ready" bot will start a game and you will hear sound "The game is starting". Also you can check your ping to server by typing "!pingall". Haven fun in your game.
 Picture 9. Typing "!ready"
 - Do not leave game before the Tree/Throne is dead or game is "!ff'd" or remaked. With "!ff" command you can vote for forfeiting game before the Tree/Throne is dead or with "!votermk" command to be remaked. You can check your win/lose ratio here.
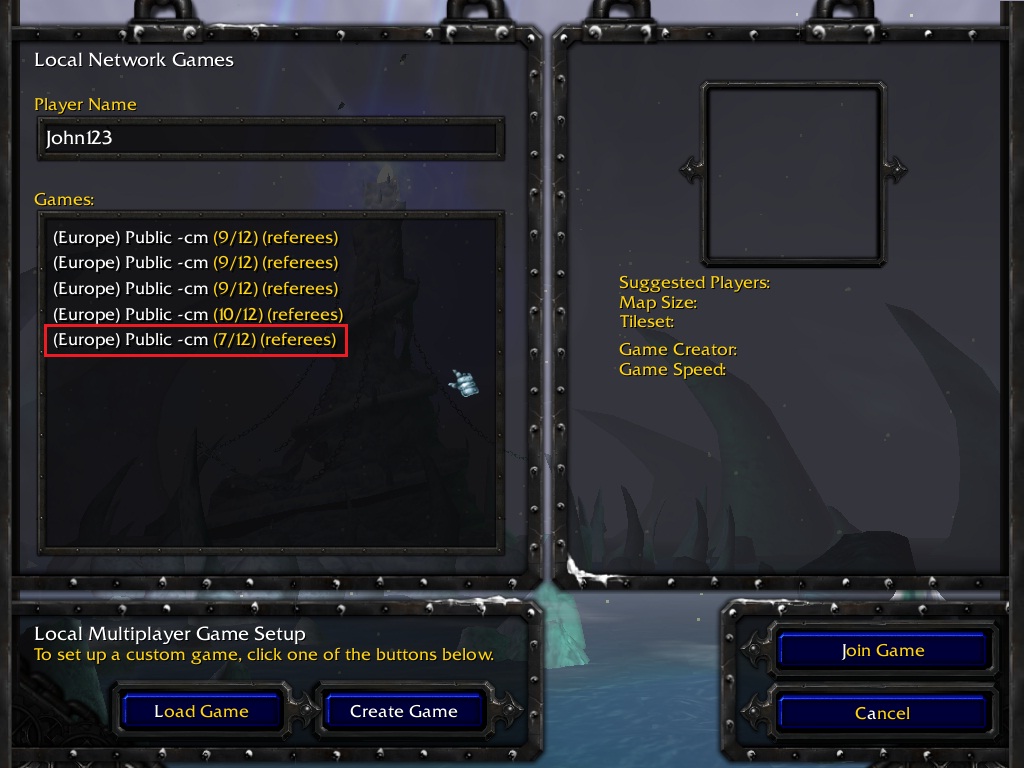
Picture 8. Hosted games list"
- Lets go back to main window. To explain better main window environment and functionality, we will divide it in few parts:
- Menu
- Rooms list and private messages
- Chat window and user list
- Games list and sign system
On the picture below you can see these parts graphically presented.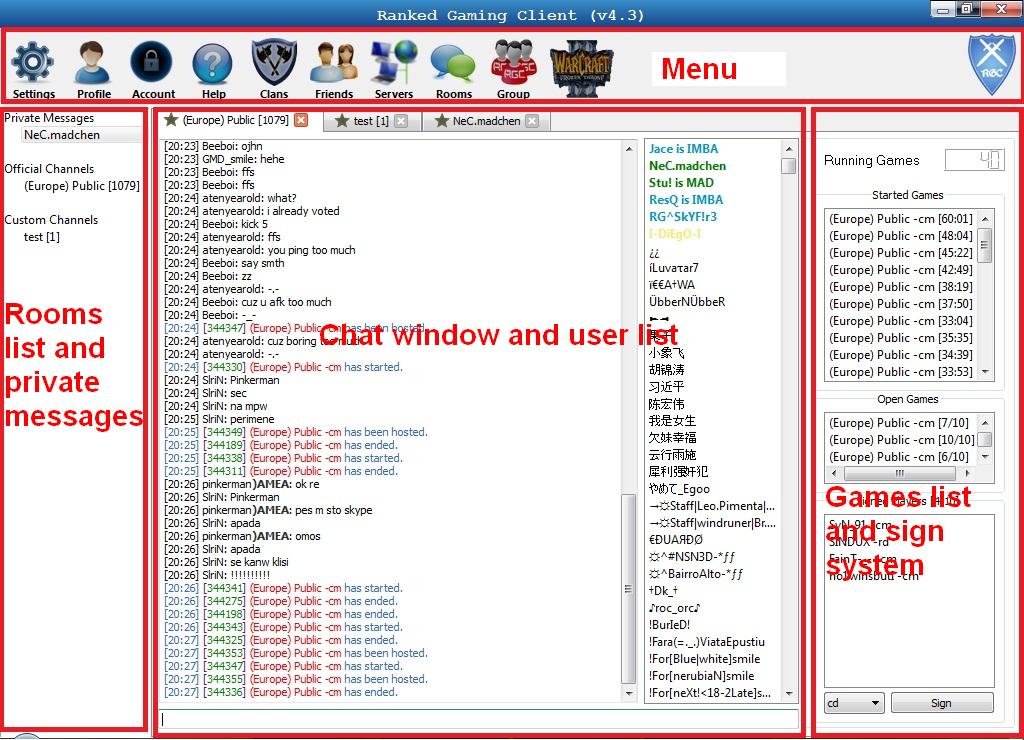 Picture 10. Main window parts
 - Chat window and user list occupy the central part of main window. Use text box on the bottom of the client to send text messages. Also you can use text box for "commands". With "commands" you can add friend, check somones profile, join another channel, whisper a user... To add user in friend list you must type "/f add name" (e.g. /f add Sir-rogers). You can check list of all commands here.refer ထာ၀ယ္အိုင္တီ

No comments:
Post a Comment