Oct 30, 2014

Windows cannot be installed to this disk ျပသနာ ေျဖရွင္းနည္း RF (Sai Thu)

windows တင္ ရင္ အခက္ ၾကံဳ ရ မဲ ့ျပသနာ တစ္ခု ေျဖရွင္းနည္း
=========================================
သင္ ့ကြန္ပ်ဴ တာ ကို windows installing လုပ္ ေတာ ့မယ္ ဆို ရင္ သင္ ့ကြန္ပ်ဴ  တာ ရဲ ့ Hard Drive ဟာ 
UEFI mode သို ့မဟုတ္  legacy  mode တစ္ခုခု နွင္ ့မိမိရဲ ့ BIOS ဟာ ကိုက္ညီမွဴ ရိွ ရ ပါမယ္။
(ဥပမာ - )  အေန နွင္ ့ “Windows cannot be installed to this disk. The selected disk is not 

of the GPT partition style” Message ေပၚ လာ ျပီး windows install လုပ္ေဆာင္ မရ ပဲ ျဖစ္ေန 
တတ္ပါတယ္။ဒါကို ဘယ္လို ေျဖ ရွင္း မလဲ ဆို ရင္ေတာ ့ကၽြန္ေတာ္ တို ့

gpt အျဖစ္ ျပန္ေျပာင္းေပး ရ ပါမယ္။
 အဆင္ ့ ( ၁ )
------------------------------

အရင္ဆံုး မိမိ ကြန္ပ်ဴ  တာ ကို restart ျပန္ခ် ပါမယ္။ 

အဆင္ ့ ( ၂ )
---------------------------------


windows ျပန္တက္လာ တာနွင္ ့F10 ကိုနိုပ္ျပီး command prompt ကိုဖြင္ ့ပါ ။
အဆင္ ့ ( ၃ )
--------------------------------
cmd  / command prompt ထဲ မွာ ေအာက္ က စာ သား ေတြ ကို ရိုက္ထည္ ့ေပးပါ။
(1 ) diskpart ကို ရိုက္ပါ။ enter ေခါက္ပါ။
(2 ) list disk ကို ဆက္ရိုက္ပါ။ enter ေခါက္ပါ။
(3 ) select disk ( formart ခ် ခ်င္ တဲ ့ disk ကို ရိုက္ပါ )
clean ကိုရိုက္ပါ enter ေခါက္ပါ။
convert gpt ကို ၇ိုက္ပါ enter ေခါက္ပါ။
exit ကိုရိုက္ျပီး ထြက္လုိက္ပါ။


လက္ေတြ ့စမ္းသပ္ လုပ္ျပ ထား တဲ ့ video ၾကည္ ့ခ်င္ သူ မ်ား အေန နွင္ ဒီမွာ ေလ ့လာ ေပးပါ။

Oct 28, 2014

တရုပ္ဖုန္းေတြရဲ ့recovery.img နဲ ့scatter.txt ထုတ္နည္းေလးပါ....


အေနာ္ကအခုမွစျပီးပို ့စ္တင္ဘူးတာျဖစ္လို ့အမွားမ်ားပါလာရင္ခြင့္လႊတ္ေပးပါေနာ္..လိုအပ္တာရွိရင္လည္း၀ိုင္းျပီးေတာ့ျဖည့္စြက္ေပးၾကပါအေနာ္.ဆရာသမားေတြရယ္ေနာ္..ဒါေလးကကၽြန္ေတာ္တို ့လိုအသင္ေတြနဲ ့ကလိခ်င္တဲ ့ယူဆာေတြအတြက္ပါ..mtk65××ေတြရဲ  ့scatter.txtနဲ ့recovery.img ထုတ္နည္းေလးပါ…..လြယ္တာကိုခက္ေအာင္လုပ္တယ္ဆိုလည္းမွားဘူးေပါ့…ဟီးးးးးးးး ေလရွည္တာနဲ ့လိုရင္းေရာက္ေတာ့ဘူး..
ပထမဆံုးလိုတာေလးေတြကိုေဒါင္းလိုက္ရေအာင္ေနာ္…..
MTK_Rom_Studio_1.1.77.301
Flash Tool V3.1224
ဖုန္းထဲက Unknow source နဲ့ USB Debugging ကို On ထားေပးပါ……..SD cardတကဒ္ေလာက္လည္းထည့္ထားေပးပါ.............ျပီးရင္ကြန္ပ်ဴတာက WIN  key+R ကိုႏွိပ္လုိက္ျပီး  Run boxမွာcmd လို ့ရိုက္ျပီးေတာ့ Enter ေခါက္လိုက္ရင္ CMD Windows ေပၚလာပါမယ္။ အဲ့ဒီအထဲမွာဒီလိုေလး ရိုက္လိုက္ပါ
cat /proc/dumchar_info
အဲလိုေလးေပၚလာျပီးရ
င္..ဒီလိုေလးဆက္ျပီးေတာ့ရိုက္လိုက္ပါဗ်ာ……
cat /proc/dumchar_info > /sdcard/firmware_info
cat /proc/dumchar_info > /mnt/sdcard2/firmware_info

ျပီးသြားရင္ေတာ ့ SD Card ထဲမွာ firmware.info ဆိုတဲ ့ file ေလးတဖိုင္ေရာက္ေနပါျပီ…အဲဒီဖိုင္ေလးကို copy ကူးျပီးကြန္ပ်ဴတာရဲ  ့Desktop ေပၚမွာfolderတခုေဆာက္ျပီးသိမ္းထားလိုက္ပါ….ျပီးရင္download ဆြဲထားတဲ ့ MTK_Rom_Studio_1.1.77.301 ဇစ္ဖိုင္ေလးကိုေစာေစာက သိမ္းထားတဲ ့ firmware.infoဖိုင္ေလးရွိတဲ ့folder ထဲမွာဇစ္ေျဖလိုက္ျပီးေတာ ့ MTK_Rom_Studio.exeေလးကိုRun လိုက္ပါ…..ဒီလိုပံုေလးတက္လာပါမယ္..


File ဆိုတာကိုႏွိပ္ပါ…Load firmware.info ကိုႏွိပ္ပါ..ျပီရင္းfirmware.info ရွိတဲ ့ဖိုင္ေနရာေလးကိုသြားျပီးfirmware.info ဆိ္ုတဲ ့ဖိုင္ေလးကို open လိုက္ပါ…..
Create Rom ကိုႏွစ္ခ်က္ႏွိပ္လိုက္ရင္ save့  ဖိုင္ေလးတက္လာပါမယ္..ျပီးရင္MT6575 ေနရာမွာကိုယ့္ရဲ ့MT6577ကိုေျပာင္းလိုက္ျပီးေတာ့ firmware.info ရွိတဲ ့ဖိုင္ေလးထဲမွာပဲ save လိုက္ပါ
အဲဒါဆိုရင္ firmware.info ဖိုင္ေလးထဲမွာ scatter.txt ဖိုင္ေလးေရာက္လာပါျပီ…အဲဒီဖိုင္ေလးထဲမွာပဲ SPFT Udate ဆိုတဲ ့ folder အသစ္ေလးတခုေဆာက္လိုက္ပါ…. ျပီးရင္ေဒါင္းထားတဲ ့ SP Flash too.zip ေလးကိုေျဖျပီးေတာ ့Flash _tool.exe ကိုRun ကိုလိုက္ပါ


ျပီးရင္ေတာ ့မင္နီ၀ိုင္းထားတဲ ့အတိုင္း scatter loading ျပီးရင္ေစာေစာက save မွတ္ထားတဲ ့mt6577_android_scatter_emmc.txt ေလးကို open လိုက္ပါ


ျပီးရင္ Read back>Add>N/A ကိုကလစ္ႏွစ္ခ်က္ႏွိပ္လိုက္ရင္boxတခုက်လာပါမည္…box မွfile name


ေနရာမွROM_0 ကို recovery.img လို ့ေျပာင္းျပီးေတာ ့SPFT Udate ဆုိတ ဲ့ဖိုင္မွာ save လိုက္ပါ


မွင္နီ၀ိုင္းထားတဲ ့ေနရာမွာေအာက္ကပံုအတိုင္းေလးေျပာင္းျပီးေတာ ့ ok ႏိွ္ပ္ပါ
 
ျပီးရင္မွင္နီ၀ိုင္းထားတဲ ့Read backကိုႏွိပ္…ဖုန္းကိုပါ၀ါပတ္ Battery ျဖဳတ္ volume  downကိုႏွိပ္ျပီးလွ်င္USB ၾကိဳးတပ္….Battery ျပန္တပ္လိုက္လွ်င္ Sp Flash tool ေလးက ေအာက္ကပံုအတိုင္းအလုပ္လုပ္ေနပါျပီ


အဲလိုေလး အစိမ္းေရာင္ပံုေလးေပၚလာရင္ေတာ ့ ေအာင္ျမင္စြာျပီးဆံုးပါျပီဗ်ာ….SPFT Udate ဆုိတဲ ့ဖိုင္ေလးထဲမွာ recovery.img

ဆိုတဲ ့ဖိုင္ေလးေရာက္ေနပါျပီဗ်ာ…အခုဆိုရင္အဲဒီ recovery.img ဖိုင္ေလးကိုသူငယ္ခ်င္းတို ့ ၾကိုက္သလိုျပန္ျပင္ျပီးေတာ့ကလိလို ့ရပါျပီဗ်ာ....ဒီပို ့ေလးမွာအမွားပါခဲ ့ရင္နဲ ့တခုခုလိုအပ္ခ်က္မ်ားရွိရင္....အားလံုးေသာကၽြန္ေတာ္သူငယ္ခ်င္းအကိုဆရာမ်ားက ၀ိုင္း၀န္းျပီးျဖည့္စြက္ေပးပါလို ့ေမတာၱရပ္ခံပါတယ္ခင္ဗ်ာ
Credit=http://newcenturys.blogspot.com/ 

Huawei Honor H30-L02 v 4.4.2 မွာ Build in Myanmar စနစ္ ထည္႔နည္း

Huawei Honor H30-L02 v 4.4.2 မွာ Build in Myanmar စနစ္ ရရန္ထည္႔သြင္းနည္းေလးျဖစ္ပါတယ္
ေအာက္မွာေပးထားတ႔ဲ Apk ကိုေဒါင္းယူျပီးအဆင္႔ဆင္႔ လုပ္ေဆာင္သြားရမွာျဖစ္ပါတယ္ အခုဒီ ဗားရွင္းမွာစမ္းသပ္ထားတာျဖစ္ပါတယ္။(Root ရွိဖို႔လိုပါမယ္)

ေဒါင္းလို႔ရလာတ႔ဲ apk ကိုဖုန္းထဲ Install လုပ္ပါ ျပီးရင္ အထဲမွ ေအာက္ပံုအတိုင္း Myanmar (Zawgyi) {သို႔မဟုတ္} Myanmar(Zawgyi)(Myanmar [Burma]) ကိုအေပၚက မ်ွားျပထားတ႔ဲ ေနရာမွာ ေရြးေပးရပါမယ္

ျပီးရင္ ေအာက္ပံုအတိုင္း မွ်ားျပထားတ႔ဲ (1)/(2) အတိုင္းနိပ္ေပးျပီး ဖုန္းကို restart ခ်ေပးလိုက္ပါ။

 ျပန္တက္လာရင္ Setting ထဲ၀င္ျပီး Language and input မွာ Myanmar(zawgyi) ကိုေရြးေပးလိုက္ရင္ေတာ႔ Setting ေတြမွာ ျမန္မာလိုျမင္ရမွာျဖစ္ပါတယ္။


သားေကာင္းရတနာ(နည္းပညာ)

ကြန္ျပဴတာ Heat တက္ျပီးျပဳတ္က်ေနသူေတြအတြက္ Hard Disk Sentinel Professional

Computer/laptop မ်ား  Heat  တက္ျပီး ျပဳတ္က်ေနသူေတြ ေဆာင္ထားသင္႔တ႔ဲ ေဆာ႔၀ဲလ္ေလး တစ္ခု တင္ေပးလိုက္ပါတယ္ အခု ဒီေဆာ႔၀ဲလ္ ေလးက စက္ရဲ႕ အပူခ်ိန္ကို Over မျဖစ္ေအာင္ ထိန္းထားေပးႏိုင္ပါတယ္ Full Version ျဖစ္ဖို႔ Patch ဖိုင္ကို အသံုးျပဳရမွာျဖစ္ပါတယ္ ေအာက္မွာ ေဒါင္းယူႏိုင္ပါျပီ။

 Hard drive Sentinel watches hard drive status, which includes wellness, temperatures as well as almost all Utes. Michael. A. 3rd r.
    Big t. (Self-Monitoring, Investigation in addition to Canceling Engineering, inbuilt almost all devices today) prices per data. Also it methods the hard drive shift velocity instantly which may be applied being a standard so they can discover probable
    Hard Disk Sentinel Pro 4.50.4 hard disk drive downfalls, performance degradations. Hard drive Sentinel might be correctly employed to prevent critical destruction or even facts decline as
    Hard Disk Sentinel Pro 4.50.4 it provides the almost all delicate hard drive wellbeing ranking technique which is incredibly delicate to drive problems. In this way a little trouble cannot be
    have missed along with a disappointment or facts decline may be forecast. This provides opportunity to back-up essential in addition to beneficial info.
    The actual Specialist version features planned in addition to automatic (on-problem) burn choices to avoid files decline brought on by not merely inability nevertheless by spyware or even random rub out in addition.


သားေကာင္းရတနာ(နည္းပညာ)

Honor 3C china and international brand မ်ားအတြက္ sim error , imei error fixer

Honor 3C က china နဲ႕ international ဆိုၿပီး brand 2 ခုလာပါတယ္။ အဲ့ brand 2 ခုစလံုးအတြက္ firmware မွားတင္တဲ့ အခ်ိန္မွာ ျဖစ္တတ္ေသာ imei error , sim error ေတြ အတြက္ tool ေလး တစ္ခု တင္ေပးလိုက္ပါတယ္။

bat file နဲ႕ ေရးထားတာ ျဖစ္တဲ့အတြက္ အသံုးျပဳရတာ လြယ္ကူပါတယ္။ မိမိ brand ကို ေရြးေပးလိုက္ယံုပါပဲ။
အကယ္လို႔မ်ား မိမိ ဖုန္း brand ကို မသိခဲ့ဘူးဆိုလွ်င္ china or international checker.bat ေလးကို run ေပးလိုက္ပါ။


Credit - Ko Hein Maung
သားေကာင္းရတနာ(နည္းပညာ)

Samsung ဖုန္းမ်ားအတြက္ Factory Mode Remover Apk

Samsung ဖုန္းမ်ား ပံုပါအတိုင္း Factory Mode ၀င္ေနခ႔ဲရင္ Remover လုပ္ေပးမ႔ဲ Apk ေလးကိုတင္ေပးလိုက္ပါတယ္ ဒီ Apk ေလးကိုေရးထားသူကေတာ႔( Ko Phyo Nyi Nyi )ျဖစ္ပါတယ္ လိုအပ္သူေတြေဒါင္းယူႏိုင္ပါျပီ။


သားေကာင္းရတနာ(နည္းပညာ)

Oct 23, 2014

Samsung firmware က်ေနေသာဖုန္း Region code ၾကည္႕နည္း

Samsung firmware က်ေနေသာဖုန္း Region code ၾကည္႕နည္း

ပိုေကာင္းပါတယ္ ဒီနည္းက မူလ စက္ရံု ထုတ္ Region ကို ပါ သိႏိုင္ ပါတယ္ ။
သို႔ ေသာ္ အခ်ိဳ႕ ဖုန္းမ်ား ကို Support မေပးပါ ။ need internet

1. Samsung Kies အရင္သြင္းပါ ။မရွိရင္ Download Here http://www.samsung.com/us/kies/ .

2.battery ၿဖဳတ္ၿပီး ဖုန္းမွာကပ္ထားတဲ႔ စာရြက္က S/N no or Serial Number မွတ္ထားပါ ။

3. ဖုန္းနဲ႔ကြန္ၿပဴတာ ခ်ိတ္ပါ

4. Samsung Kies ဖြင္႔ပါ။ ျပီးလွ်င္ Tools ထဲ မွ Firmware Upgrade and Initialization ၀င္ပါ.

5. ဖုန္းေမာ္ဒယ္ ကို စာလံုးအၾကီး နဲ႔ အကုန္ေရးပါ ။ဥပမာ - GT-I9100 ,
Image
6. ၿပီးလွ်င္ S/N or serial number ရိုက္ပါ ။စာလံုး အၾကီးအေသးမွန္ ရပါမယ္ ။

Image

7.box တခုေပၚ လာရင္ Region code သိ ရၿပီ ၿဖစ္ပါတယ္ ။

အကယ္ လို႔ လိုင္းေကာင္းလို႔ တင္ခ်င္တယ္ ဆို next ေတြ ဆက္လုပ္ေပးပါ ။သူ႔ ဘာသူ ေဒါင္းၿပီး တခါတည္း Firmware တင္သြားပါမယ္ ။

Region Code ဖတ္ရန္

samsung official letter code. or CSC by Country

A
B
C
Algeria.
ALG = ALGERIA
ALR = ALGERIA
Argentina.
ANC = ARGENTINA
ARO = ARGENTINA
CTI = ARGENTINA
UFN = ARGENTINA
PSN = ARGENTINA
Aruba.
ARU = ARUBA
Australia.
OPP = AUSTRALIA
OPS = AUSTRALIA
VAU = AUSTRALIA
XSA = AUSTRALIA
TEL = AUSTRALIA
HUT = AUSTRALIA
Austria.
AOM = AUSTRIA
DRE = AUSTRIA
MAX = AUSTRIA
MOB = AUSTRIA
MOK = AUSTRIA
ONE = AUSTRIA
TRG = AUSTRIA
ATO = AUSTRIA

Baltick.
SEB = BALTICK
Belarus.
MTB = BELARUS
VEL = BELARUS
Belgium.
BAE = BELGIUM
BSE = BELGIUM
PRO = BELGIUM
XEB = BELGIUM
Bosnia-Herzegovina.
BHO = BOSNIA-HERZEGOVINA
BHT = BOSNIA-HERZEGOVINA
TEB = BOSNIA-HERZEGOVINA
Brazil.
BTA = BRAZIL
BTM = BRAZIL
TMR = BRAZIL
ZTA = BRAZIL
ZVV = BRAZIL
ZTO = BRAZIL
ZTM = BRAZIL
Bulgaria.
CMF = BULGARIA
GBL = BULGARIA
MTE = BULGARIA
MTL = BULGARIA
OMX = BULGARIA
PLX = BULGARIA
VVT = BULGARIA

Cambodia.
RCG = CAMBODIA
Canada.
RGS = CANADA
BMC = CANADA
TLS = CANADA
Chile.
CHB = CHILE
CHE = CHILE
CHL = CHILE
CHT = CHILE
China.
CUH = CHINA
INT = CHINA
TEC = CHINA
TIY = CHINA
CMC = CHINA
CHN = CHINA
M00 = CHINA
Colombia.
COB = COLOMBIA
COL = COLOMBIA
COM = COLOMBIA
CGU = COLOMBIA
Costa Rica.
ICE = COSTA RICA
Croatia.
CRO = CROATIA
TRA = CROATIA
TWO = CROATIA
VIP = CROATIA
Cyprus.
CYV = CYPRUS
Czech.
ETL = CZECH
KBN = CZECH
OSK = CZECH
VDC = CZECH
XCS = CZECH
XEZ = CZECH
TMZ = CZECH
O2C = CZECH
D
E
F
Denmark.
DTL = DENMARK
Dominican Rep.
CDR = DOMINICAN REP.
TDR = DOMINICAN REP.
Dominica.
CST = DOMINICA
DCN = DOMINICA
DOR = DOMINICA

Ecuador.
BBE = ECUADOR
Egypt.
EGY = EGYPT
El Salvador.
DGC = EL SALVADOR
TBS = EL SALVADOR

Finland.
ELS = FINLAND
SAU = FINLAND
France.
OFR = FRANCE
AUC = FRANCE
BOG = FRANCE
COR = FRANCE
DIX = FRANCE
FTM = FRANCE
NRJ = FRANCE
ORC = FRANCE
ORF = FRANCE
SFR = FRANCE
UNI = FRANCE
VGF = FRANCE
XEF = FRANCE
Germany.
DBT = GERMANY
DTM = GERMANY
DUT = GERMANY
EPL = GERMANY
MAN = GERMANY
MBC = GERMANY
VD2 = GERMANY
VIA = GERMANY
XEG = GERMANY
G
H
I
Ghana.
SPN = GHANA
Greece.
AOC = GREECE
COS = GREECE
EUR = GREECE
GER = GREECE
TGR = GREECE
VGR = GREECE
CYO = GREECE
Guatemala.
PCS = GUATEMALA
Hong Kong.
TGY = HONG KONG
Hungary.
PAN = HUNGARY
VDH = HUNGARY
WST = HUNGARY
TMO = HUNGARY
XEH = HUNGARY
TMH = HUNGARY
India.
HFC = INDIA
HYA = INDIA
INA = INDIA
IND = INDIA
INU = INDIA
IMS = INDIA
REL = INDIA
TAT = INDIA
INS = INDIA
Indonesia.
AXI = INDONESIA
SAR = INDONESIA
XSE = INDONESIA
Iran.
THR = IRAN
Ireland.
3IE = IRELAND
EIR = IRELAND
VDI = IRELAND
Israel.
CEL = ISRAEL
PCL = ISRAEL
PTR = ISRAEL
Italy.
GOM = ITALY
HUI = ITALY
ITV = ITALY
OMN = ITALY
TIM = ITALY
VOM = ITALY
WIN = ITALY
XET = ITALY
FWB = ITALY
Ivory Coast.
IRS = IVORY COAST
SIE = IVORY COAST
J
K
L
Jamaica.
JBS = JAMAICA
JCN = JAMAICA
JCW = JAMAICA
Japan.
DCM = JAPAN
SBM = JAPAN
VFK = JAPAN
******.
LEV = ******
Kazakhstan.
EST = KAZAKHSTAN
KCL = KAZAKHSTAN
KMB = KAZAKHSTAN
KZK = KAZAKHSTAN
SKZ = KAZAKHSTAN
Kenya.
KEL = KENYA
KEN = KENYA
Korea.
SKT = KOREA
Libyan Arab Rep.
MMC = LIBYAN ARAB REP
Lithuania.
TLT = LITHUANIA
Luxemburg.
LUX = LUXEMBURG

M
N
O
Macao.
VTN = MACAO
Macedonia.
TMC = MACEDONIA
MBM = MACEDONIA
Malaysia.
CCM = MALAYSIA
MXS = MALAYSIA
FMG = MALAYSIA
FME = MALAYSIA
XME = MALAYSIA
Maxico.
SEM = MAXICO
TCE = MAXICO
TMM = MAXICO
UNE = MAXICO
Mongolia.
MPC = MONGOLIA
Morocco.
WAN = MOROCCO
FWD = MOROCCO
MAT = MOROCCO
MED = MOROCCO
SNI = MOROCCO
MWD = MOROCCO
Netherlands.
BEN = NETHERLANDS
MMO = NETHERLANDS
ONL = NETHERLANDS
QIC = NETHERLANDS
TFT = NETHERLANDS
TNL = NETHERLANDS
VDF = NETHERLANDS
VDP = NETHERLANDS
XEN = NETHERLANDS
KPN = NETHERLANDS
New Zealand.
VNZ = NEW ZEALAND
Nigeria.
ECT = NIGERIA
GCR = NIGERIA
MML = NIGERIA
Norway.
TEN = NORWAY

P
Q
R
Pakistan.
WDC = PAKISTAN
PAK = PAKISTAN
Panama.
BPC = PANAMA
PCW = PANAMA
PBS = PANAMA
Peru.
PEB = PERU
PET = PERU
SAM = PERU
Philippines.
FAM = PHILIPPINES
XTC = PHILIPPINES
GLB = PHILIPPINES
XTE = PHILIPPINES
SMA = PHILIPPINES
Poland.
ERA = POLAND
IDE = POLAND
PLS = POLAND
PRT = POLAND
XEO = POLAND
Portugal.
OPT = PORTUGAL
TMN = PORTUGAL
TPH = PORTUGAL
XEP = PORTUGAL
TCL = PORTUGAL
Puerto Rico.
CEN = PUERTO RICO
PCI = PUERTO RICO
TPR = PUERTO RICO


Romania.
CNX = ROMANIA
HAT = ROMANIA
ORO = ROMANIA
COA = ROMANIA
Russia.
AZC = RUSSIA
BLN = RUSSIA
EMT= RUSSIA
ERS = RUSSIA
GEO = RUSSIA
MTV = RUSSIA
SER = RUSSIA
SNT = RUSSIA
S
T
U
Saudi Arabia.
JED = SAUDI ARABIA
Serbia Montenegro.
MSR = SERBIA MONTENEG
PMN = SERBIA MONTENEG
SMO = SERBIA MONTENEG
TSR = SERBIA MONTENEG
TOP = SERBIA MONTENEG
Singapore.
BGD = SINGAPORE
XSO = SINGAPORE
XSP = SINGAPORE
Slovenia.
MOT = SLOVENIA
SIM = SLOVENIA
Slovakia.
GTL = SLOVAKIA
IRD = SLOVAKIA
TMS = SLOVAKIA
ORS = SLOVAKIA
South Africa.
XFA = SOUTH AFRICA
XFC = SOUTH AFRICA
XFM = SOUTH AFRICA
XFV = SOUTH ARFICA
XFE = SOUTH AFRICA
South West Asia.
SWA = SOUTH WEST ASIA
Spain.
AMN = SPAIN
EUS = SPAIN
FOP = SPAIN
XEC = SPAIN
ATL = SPAIN
Sweden.
BAU = SWEDEN
BCN = SWEDEN
BME = SWEDEN
BSG = SWEDEN
BTH = SWEDEN
COV = SWEDEN
HTS = SWEDEN
SEN = SWEDEN
TET = SWEDEN
TLA = SWEDEN
XEE = SWEDEN
VDS = SWEDEN
TNO = SWEDEN
Switzerland.
AUT = SWITZERLAND
ORG = SWITZERLAND
MOZ = SWITZERLAND
SUN = SWITZERLAND
SWC = SWITZERLAND
Taiwan.
TWM = TAIWAN
BRI = TAIWAN
TCC = TAIWAN
TCI = TAIWAN
CWT = TAIWAN
Temporary.
TEM = TEMPORARY
Thailand.
CAT = THAILAND
THE = THAILAND
THL = THAILAND
THO = THAILAND
THS = THAILAND
Tanzania.
SOL = Tanzania
Tunesia.
ABS = TUNISIA
RNG = TUNISIA
Turkey.
BAS = TURKEY
KVK = TURKEY
TUR = TURKEY
TLP = TURKEY
TRC = TURKEY
Ukraine.
KVR = UKRAINE
SEK = UKRAINE
UMC = UKRAINE
United Arab Emirat.
MID = UNITED ARAB EMIRAT
ARB = UNITED ARAB EMIRAT
XSG = UNITED ARAB EMIRAT
AFR = UNITED ARAB EMIRAT
ITO = UNITED ARAB EMIRAT
United Kingdom.
BTC = UNITED KINGDOM
O2I = UNITED KINGDOM
O2U = UNITED KINGDOM
ORA = UNITED KINGDOM
TMU = UNITED KINGDOM
TSC = UNITED KINGDOM
VOD = UNITED KINGDOM
XEU = UNITED KINGDOM
VIR = UNITED KINGDOM
H3G = UNITED KINGDOM
CPW = UNITED KINGDOM
USA.
AWS = USA
DOB = USA
TMB = USA
CLW = USA
Uzbekistan.
UZB = UZBEKISTAN

V
W
X
Venezuela.
VMT = VENEZUELA
Vietnam.
XXV = VIETNAM
PHU = VIETNAM
XEV = VIETNAM
DNA = VIETNAM
FPT = VIETNAM
SPT = VIETNAM
TLC = VIETNAM
VTC = VIETNAM
VTL = VIETNAM
 
Post from MMSD Forum
 

4.4 , 4.3 , 4.2.2 , 4.1.X Gapp Installer ေလးပါ...

 4.4 , 4.3 , 4.2.2 , 4.1.X ထိ Google Playstore သြင္းႏိုင္တဲ့ Installer ျဖစ္ပါတယ္


ref:Myanaungtharr Phyogyi
 
Download
 

ဖုန္းထဲမွာတင္ Video မ်ားကို Edit & Create ျပဳလုပ္ေပးႏိုင္မယ္-VivaVideo Pro: Video Editor v3.5.1apk

Android ဖုန္းကိုင္းေဆာင္ထားတယ္ေဘာ္ဒါေတြအတြက္မိမိၾကိဳက္ႏွစ္သက္တဲ့ video ေလးေတြကိုအေကာင္းဆံုး တည္းၿဖတ္ေပးႏိူင္မယ့္ VivaVideo Pro: Video Editor v3.5.1 ဗားရွမ္သစ္ေလးကိုတင္ေပးလုိက္ပါတယ္။video ေတြကိုမိမိလိုသလိုအလြယ္တကူတည္းၿဖတ္ႏိူင္ၿပီး မိမိၾကိဳက္တဲ့ video ေတြထဲက မိမိၾကိဳက္ႏွစ္သက္တဲ့အခန္းေလးေတြကို ဓာတ္ပံုေတြအၿဖစ္နဲ႕ပါထုတ္ႏိူင္ၿပီး video ေတြကိုလဲ mp3 သီခ်င္းေတြၿဖစ္တဲ့ audio ေတြအၿဖစ္သို႕ေၿပာင္းထုတ္ႏိူင္ပါေသးတယ္ ။ ရီစရာဟာသ Video ေလးအျဖစ္လည္း ဓါတ္ပံုမ်ား Video မ်ားကိုဖန္တီးေပးႏိုင္ပါေသးတယ္။ မိမိၾကိဳက္တဲ့ effect လွလွေလးေတြနဲ႕အလန္းစားေလး ၿပင္ႏိူင္သလို  subtitles အေနနဲ႕စာတန္းေလးေတြပါထည့္ထိုးႏိူင္ပါတယ္ ဒါ့အၿပင္ဓာတ္ပံုေတြသီခ်င္းေတြနဲ႕ ဖန္တီးယူႏိူင္သလိုလိုင္းထဲကိုလဲတခါတည္းရွယ္ႏိူင္ပါတယ္ ။ Feature အေသးစိတ္ကိုေတာ့ ေအာက္မွာေရးျပထားပါတယ္ဗ်ာ။ Application ေလးရဲ႕ပံုစံကိုၾကည့္ႏိုင္ဖို႕ Screen ေတြ ကိုေအာက္မွရိုက္ျပထားပါတယ္ဗ်ာ။ဒီေကာင္ေလး၏ဖုိင္းဆိုဒ္ေလးကေတာ့23.9MB ျဖစ္ျပီး Android OS 2.3.3 အထက္ရွိဖုန္းမ်ားသံုးႏိုင္ပါတယ္ဗ်ာ။
 ေဘာ္ဒါတို႔ နည္းပညာမ်ား, Software and Application မ်ားကို အဆင္ေျပစြာျဖင့္ယူသြားခဲ့ျပီးေနာက္ 
ေက်းဇူးျပဳ၍ ေၾကာ္ျငာကလစ္ရန္မေမ႔ပါနဲ႔။ ထိုေၾကာင့္ေအာက္က ေၾကာ္ျငာတစ္ခုကလစ္ေပးျခင္းျဖင့္ကူညီ
ေပးခဲ့ပါ။


အဆင့္ ၁ ေအာက္မွာ Download Here ဆိုတာကိုႏွိပ္ကိုက္ပါ။
အဆင့္ ၂ Adfly မွာ 5 seconds ေလာက္ေစာင့္ ေပးပါ။
အဆင့္ ၃ << SKIP AD>> ကို ႏွိပ္ေပးပါ။
အဆင့္ ၄ Download link က်လာပါလိမ့္မယ္။
အဆင့္ ၅ ဖိုင့္ေလးကိုေဒါင္းေပးလိုက္ပါ။
အဆင့္ ၆ အဆင္ေျပပါသြားျပီး ခိခိ


Oct 22, 2014

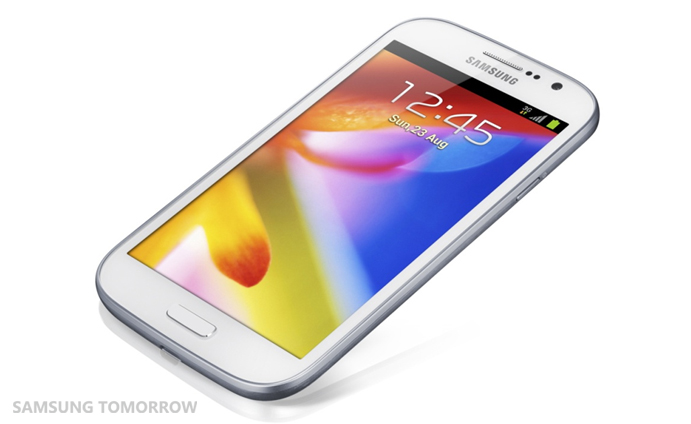
Sumsang Galaxy Grand DUOS (GT-I9082) ကို Firmwares တင္နည္း

အခုေနာက္ပိုင္းမွာ ေတာ္ေတာ္ေတြ ့ေနရတဲ့ andriod ေတြကို firmware တင္နည္းတခုကို ေၿပာ ၿပပါမယ္ android phone ေတာေတာမ်ားမ်ားဟာ အမွားလုပ္မိတာနဲ႕ firmware လစ္ေတာတာဘဲ အမ်ားအာၿဖင့္ ့့root လုပ္ၿပီ boot ၿပန္အတက္မွာ samsung logo မွာရပ္ေနတက္ပါတယ္ ကိုယ္က ဖုန္းကို root ေတာမယ္ဆိုရင္ အရင္ဆံုး ကိုယ္ဖုန္းရဲ့firmware ေတြကို အရင္ရွာထားၿပီမွ root လုပ္ေစၿခင္ပါတယ္ အခန္႔မသင့္ရင္ firmware ရွာမရတဲ့ဖုန္းဆို ဒီအတိုင္မသံုးရဘဲ ၿပစ္လိုက္ရပါမယ္ ....

Galaxy Grand DUOS (GT-I9082) ကို Firmwares တင္ရန္အတြက္ ေအာက္ကဖိုင္ကိုၾကိဳက္ႏွစ္သက္ရာေဒါင္းလိုက္ပါ......။

မိမိေဒါင္းျပီးေကာ္ပီထည့္ရမဲ့ SDcard ကို အရင္ format ခ်ရပါမယ္.....။ဒါင္လို ့ရလာတဲ့ zip ဖိုင္းကို format ခ်ထားေတာ SD card ထဲသို ့ copy ကူထည့္လိုက္ပါ...။ၿပီးရင္ sd card ကို ဖုန္းထဲသို ့ထည့္ၿပီ ဖုန္းပိတ္ထားလိုက္ပါ ၿပီရင္  firmware တင္ဖို ့အတြက္ recovery mode ၿဖစ္ေအာင္၀င္ရပါမယ္  ။ (vol up (အသံခ်ဲ႕ခလုပ္)+ power + home button)  ။    recovery mode သို ့ေရာက္ လာၿပီဆိုရင္ firmware မတင္ခင္ဖုန္းထဲမွာရွိတဲ့ အမွိဳက္ေတြကို အရင္ရွင္းရမွာၿဖစ္တဲ့အတြက္ vol ခလုတ္ေတြအသံုးၿပဳၿပီ wipe data/factory reset ေနရာကိုသြားၿပီ ဖုန္းေခၚတဲ့ခလုတ္ကို တစ္ခ်က္ႏိွပ္ေပးပါ ၿပီးရင္ အထဲကစာတန္ေတြထဲက Yes – delete all user data ကိုႏိွပ္ေပးလိုက္ပါ   သူဟာသူလုပ္  သြားပါမယ္   ၿပီးရင္  ေစာေစာက မူလမ်က္နွာ   ၿပန္ေရာက္သြားပါမယ္
ဒီအခါ firmware တင္ဖို     ့အတြက္ apply update from sdcard ဆိုတဲ့   စာတန္းကို  ေရြးၿပီ ေစာေစာက
copy ကူထားတဲ့  I9082XXAMB3_I9082ODDMB2_SLK.zip ဖိုင္းေရြးေပးလိုက္ရင္ သူဟာသူ firmware တင္သြားပါမယ္ၿပီးရင္ reboot လုပ္ေပးလိုက္ရင္ ဖုန္းပိတ္ၿပီ ၿပန္တက္လာရင္ အာလံုးအိုေက ပါၿပီ  ။  တစ္ခါတစ္ေလ ၿပန္မတက္လာေသး ရင္ ေစာေစာက အမွိဳက္ရွင္းသလို ၿပန္လုပ္ၿပီ ဘက္ထရီးၿဖဳတ္ၿပီး၃မိနစ္ေလာက္ထားၿပီး ၿပန္တပ္ၿပီး ၿပန္ဖြင့္ပါ အာလံုးေအာင္ၿမင္သြားပါလိမ့္မယ္.......။
ေတာင္းပန္ခ်က္.....းက်ေနာ္ပိုစ္ေရးတာမၾကာေသးတဲ့အတြက္လိုအက္ခ်က္ေလးေတြ ရွိမယ္ဆိုရင္ေတာင္းပန္ပါတယ္.....။လိုအပ္ခ်က္မ်ားကိုေတြ႕ရင္ေထာက္ျပေပးၾကပါလို႕ အကူညီေတာင္းခ်င္ပါတယ္... ။လိုအပ္တာေလးေတြကိုအတတ္နိုင္ဆံုးျပဳျပင္ျပီး
ျပည့္စံုေအာင္ ၾကိဳးစားပါသြားပါမယ္....ေက်းဇူးတင္ပါတယ္....။
အားလံုးအဆင္ေျပပါေစလို႕ေမွ်ာ္လင့္ပါတယ္....။
 
Refer  http://www.tawwinminntharlay.com
ညီေလးေဇာ္မင္းသန္း ဆိုက္ကျပန္လည္ျဖန့္ေ၀ေပးလိုက္တာပါ


Samsung Glaxy Grand GT-I9082 သံုးတဲ့ကိုကိုမမေတြအတြက္ ၿမန္မာစာအသင့္ပါျပီးသား Firmware ေလးတင္ေပးလိုက္ပါတယ္။တစ္ခုၾကိဳေျပာခ်င္တာကေတာ့ ကြ်မ္းက်င္မွသာတင္ၾကဖို႔ပါ။မိမိရဲ႕အားနည္းခ်က္တစ္ခုေၾကာင့္ Firmware တင္ရင္းဖုန္းတစ္ခုခုျဖစ္သြားရင္ေတာ့ အေနာ္တို႔တာ၀န္မဟုတ္ပါ။Do as your own risk ပဲေနာ္။ကဲစလိုက္ရေအာင္.......
အရင္ဆံုး ဖုန္း Driver ေလးကို ဒီမွာ ေဒါင္းလိုက္ပါ။ျပီးရင္ေတာ့ ဒီဖိုင္ေလး GT I9082 Firmware ကိုေဒါင္းလိုက္ပါ။ေဒါင္းလို႔ရထားတဲ့ဖိုင္ေလးကို extract လုပ္လိုက္ပါ။ျပီးရင္ odin ကို ဒီမွာ ေဒါင္းယူလိုက္ပါ။

ေဒါင္းတဲ့ကိစၥေတြျပီးျပီဆိုရင္ odin ကို run လိုက္ပါ။ဖုန္းကိုပိတ္လိုက္ပါ။ျဖစ္နိုင္ရင္ဓါတ္ခဲကို ခနေလာက္ထုတ္ျပီးျပန္ထည့္ေပးပါ။ျပီးရင္ volume down+menu+power ကိုႏွိပ္ျပီး download mode ၀င္ပါ။ download mode ၀င္လုိက္ျပီဆိုတာနဲ႔ odin ကဖုန္းကို သိျပီဆိုရင္ အ၀ါေရာင္ေလးေပၚလာပါလိမ့္မယ္။ဒါဆိုရင္ေတာ့ firmware တင္ဖို႔အသင့္အေနအထားကိုေရာက္ေနပါျပီ။ကိုယ္နဲ႔မဆိုင္တာေတြကိုဘာမွသြားမလုပ္ပါနဲ႔။ PDA ဆိုတဲ့ေနရာမွာ click တစ္ခ်က္ႏွိပ္လိုက္ပါ။ျပီးရင္ခုနကေဒါင္းထားတဲ့ firmware ဖိုင္ထဲက MD5 ဖိုင္ေလးကိုလမ္းေၾကာင္းေပးျပီးေရြးေပးလိုက္ပါ။ေရြးေပးျပီးရင္ေတာ့ start ကိုႏွိပ္ေပးလိုက္ပါ။ဖုန္းကိုတတ္နိုင္သမွ်ျငိမ္ေနေအာင္ထားပါ။ဒီအခ်ိန္ကအေရးၾကီးပါတယ္။မေတာ္တဆၾကိဳးလြတ္သြားရင္error တက္ျပီးေတာ့ power dead ျဖစ္သြားတတ္ပါတယ္။firmware တင္တာျပီးသြားရင္ေတာ့ ဖုန္းဟာသူ႕ဟာသူ ပိတ္ျပီးျပန္ပြင့္လာပါလိမ့္မယ္။ပထမဆံုးစတက္တဲ့အခ်ိန္မွာနည္းနည္းၾကာတတ္ပါတယ္။နည္းနည္းသည္းခံေစာင့္ပါ။ျပန္တက္လာျပီဆိုရင္ေတာ့
အလန္းစားျမန္မာစာပါျပီးသား firmware ေလးနဲ႔လန္းနိုင္ပါျပီဗ်ာ။အားလံုးပဲအဆင္ေျပၾကလိမ့္မယ္လို႔ေမွ်ာ္လင့္ပါတယ္.......
- See more at: http://academytcl.blogspot.com/2014/01/samsung-glaxy-grand-gt-i9082-firmware.html#sthash.SfrtkaBR.dpuf

Pointstone System Cleaner V 7.5.8.540 With Patch


Cleaner အသစ္ေလးေတြ႕လို႕တင္ေပးလိုက္ပါတယ္ခင္ဗ်ာကြန္ျပဴတာရဲ႕ System တစ္ခုလံုးကို ရွင္းလင္းေပးႏိုင္တဲ႕ Software ေလးတစ္ခုမွ်ေ၀ေပးလိုက္ပါတယ္ဗ်ာ။ Point stone System Cleaner v7.5.8.540 ဆိုတဲ႕ Software ေလးက ကြန္ျပဴတာရဲ႕ System ပိုင္းကိုသာမက Hard Drive ေတြကိုပါရွင္းေပးႏိုင္ပါတယ္ဗ်။  
ဒီေကာင္ေလးကလဲတမူထူးျခားပီးစြမ္းေဆာင္ရည္ေကာင္းပါတယ္..Browser ေတြထဲထိလိုက္ပီး Clean လုပ္ေပးတယ္လို႕ဆိုထားပါတယ္.ေအာက္မွာဖတ္ၾကည့္ပီး ေဒါင္းယူႏိုင္ပါတယ္ခင္ဗ်ာ.
အျမဲတမ္းသံုးႏုိင္ေအာင္Patchကိုပါထည္႕ေပးထားပါတယ္ေနာ္။Full ျဖစ္ေအာင္လို႕Patch ဖိုင္ေလးပါထည့္ေပးထားပါတယ္။


After you got Technology, Software and Application at my website,Please,you don't forget to click my Ads.


System Cleaner™ is a tool for restoring hard-drive space, cleaning up the history of your activities on your computer and keeping your system running like new. The program allows you to clean your drives from unnecessary and temporary files, including your browser cache, cookies, history, recent document list, temporary files, errant uninstall entries and more. It targets more than 100 file extensions, which enable it to scan and recognize most of the unnecessary files on your computer. You can choose to delete the files to the recycle bin or to a specified backup folder. In addition, System Cleaner includes a Windows Startup manager and also allows you to remove invalid uninstaller information from the registry as well as a restore wizard to undo the changes if needed.

Key Features:
• Restores your hard drive's performance, hard-drive space and protect your privacy by cleaning Internet history, cache, temporary files, Windows temp files, recent document list, find history, run history, *.CHK files, the recycle bin, additional garbage and much, much more.
• Scans dead shortcuts from your Start menu and Desktop. If it finds any shortcuts that point to files that do not exist, it will list them for you.
• Lets you delete or disable entries that automatically start on Windows startup. This pulls all entries from your Start Menu-Programs-Startup folder as well as from the registry.
• Define your own user defined items to remove (specified files or folders).
• Backup files to a ZIP file or proprietary file format. You can later restore individual files using the "Restore Wizard".
• Clean Directories and Internet Cache Files. Allows you to clean directories that usually have Temporary Files or cache files (Windows Temp Directory, Documents Folder, MS Internet Explorer Cache Directory and Netscape Cache Directory).
• Powerful file search. You can select to scan for files between a certain date, with some or all file attributes, with a certain size or with the contents of a file matching a user-defined text string.
• Remove files to Recycle Bin, zip them, move them to a folder or completely delete them!
• Scans multiple hard drives.
• Fixes system errors that slow your PC down and cause it to crash
• Speeds up your PC's execution of software programs
• Removes space-wasting temporary files and other unnecessary disk clutter
• Tunes up and optimizes the Windows Registry
• Erases all evidence of your computer and internet activity
• Makes your PC boot faster
• Makes your PC shutdown faster
• Fine-tunes all important Windows settings


OS : Windows® 8 / 7 / Vista / XP (32 and 64 bit)
Language : English

Home Page - http://pointstone.com

အဆင့္ ၁ ေအာက္မွာ Download Here ဆိုတာကိုႏွိပ္ကိုက္ပါ။
အဆင့္ ၂ Adfly မွာ 5 seconds ေလာက္ေစာင့္ ေပးပါ။
အဆင့္ ၃ << SKIP AD>> ကို ႏွိပ္ေပးပါ။
အဆင့္ ၄ Download link က်လာပါလိမ့္မယ္။
အဆင့္ ၅ ဖိုင့္ေလးကိုေဒါင္းေပးလိုက္ပါ။
အဆင့္ ၆ အဆင္ေျပပါသြားျပီး ခိခိ


Paragon Hard Disk Manager 15 Professional 10.1.25.294 Portable Full Version

မဂၤလာပါဗ်ာ။ User ေတြအတြက္ Software မတင္တာၾကာျပီးဗ်ာ။ ဒီတစ္ေခါက္ေတာ့ ေဘာ္ဒါတို႔ Hard Disk အပိုင္းခြဲျခင္း Restore လုပ္ျခင္းႏွင့္ သတ္ဆိုင္ေသာ Paragon Hard Disk Managerကိုတင္ေပးလိုက္ပါတယ္။ Hard Disk အပိုင္းခြဲ Restore လုပ္ျခင္း စသျဖင့္ေပါ့ဗ်ာ အစံုလုပ္လို႔ရပါတယ္။ေနာက္ျပီး အေ၇းၾကီဆံုးတစ္ခုကေတာ့  Backup & Recovery ကို
အေကာင္းျဖစ္ေအာင္းကူညီေပႏိုင္ျပီးအေထာက္အကူးျပဳတဲ့ Softwareေလးျဖစ္ပါတယ္။ User ေတြအတြက္Full ျဖစ္ေရက်ေနာ္ Portable ျဖစ္တင္ေပးထားပါတယ္။
After you got Technology, Software and Application at my website,Please,you don't forget to click my Ads.


he Hard Disk Manager 15 Professional includes everything you need for cutting-edge data management and opens up professional system administration options which had never before been possible. Tools such as high-performance file exclusion filters for efficient backup and recovery operations, the sophisticated Paragon partitioning engine, the capability of editing virtual hard disks, Hyper-V guest system backup functions, the powerful scripting option, expanded support for virtual machines and much more make the Hard Disk Manager Professional the preferred hard disk and system administration software on the market.

System & data backup
Back up entire Windows system, individual partitions or selected files. Use the scripting engine to automate frequently used operations and benefit from the variety of virtual backup containers which simplify work with virtual environments. Whatever you choose – the space-saving pVHD format or a backup for later use as a virtual system (such as a virtual Hyper-V container), you will always have the full selection of backup options (sector and file-based, differential or incremental backups or special file complements). Password protection keeps sensitive data safe from unauthorized access. For data requiring special security, the Hard Disk Manager 15 Professional also supports drives encrypted with BitLocker.

 What's new in version 15:
- (New) Agentless MS Hyper-V Backup
- (New) Secure data wiping – even on SSDs
- Free Update* for Windows 10 Support!
- (New) Agentless protection of Hyper-V guest machines
- (New) File-level backup/restore for virtual containers (pVHD, VHD, VHDX, VMDK)
- (New) Paragon Recovery Media Builder 3.0
- (Update) Refactored P2V Restore Wizard
- (New) Revised Graphical User Interface (GUI)
- (New) Wiping SSD

Home Page - http://www.paragon-software.com

အဆင့္ ၁ ေအာက္မွာ Download Here ဆိုတာကိုႏွိပ္ကိုက္ပါ။
အဆင့္ ၂ Adfly မွာ 5 seconds ေလာက္ေစာင့္ ေပးပါ။
အဆင့္ ၃ << SKIP AD>> ကို ႏွိပ္ေပးပါ။
အဆင့္ ၄ Download link က်လာပါလိမ့္မယ္။
အဆင့္ ၅ ဖိုင့္ေလးကိုေဒါင္းေပးလိုက္ပါ။
အဆင့္ ၆ အဆင္ေျပပါသြားျပီး ခိခိ


Oct 20, 2014

ဓါတ္ပံုမ်ားကို ျပဳ ျပင္ႏိုင္ ဖန္တီးေပးႏိုင္တဲ့-Pho.to Lab PRO - photo editor v2.0.178 APK

Android Phone ထဲမွာ ဓါတ္ပံုေတြကို မိမိစိတ္ၾကိဳက္ျပဳျပင္ႏိုင္ ဖန္တီးႏိုင္တဲ့ Application ေလးတင္ေပးလိုက္ပါ တယ္ဗ်ာ။ ဓါတ္ပံုေတြကို ေနာက္ခံ Background မ်ားေျပာင္းျခင္း ၊ Color Effect မ်ားထည့္ျခင္း ၊ အသင့္ပါ၀င္ျပီး သား Frame မ်ားထည့္ျခင္း ၊ အျပင္အျခားေသာ Feature ေပါင္းမ်ားစြာပါ၀င္ပါတယ္။

ေပါ့ေပါ့ပါးပါးနဲ႕ အသံုးျပဳ လို႕ေကာင္းတဲ့ Editing Application ေလးတစ္ခုျဖစ္ပါတယ္။ ဖန္တီးထားျပီးသား ပံုေတြကိုလည္း အရည္ေသြး မွီတဲ့ ရုပ္ထြက္ေကာင္းတဲ့ ဓါတ္ပံုေတြရရွိမွာျဖစ္ပါတယ္ဗ်ာ။ ေဘာ္ဒါတို႔အတြက္ က်ေနာ္ ေအာက္မွာ Screen Short ရိုက္ျပထားပါတယ္။ Android OS 2.1 ႏွင့္အထက္ဖုန္းမ်ားမွာအသံုးျပဳ နိုင္မွာျဖစ္ပါတယ္ဗ်ာ။

 ေမတၱာရပ္ခံခ်က္=ေအာက္ ေၾကာ္ျငာတစ္ခု ကလစ္ေပးခဲ့ပါေနာ္


အဆင့္ ၁ ေအာက္မွာ Download Here ဆိုတာကိုႏွိပ္ကိုက္ပါ။
အဆင့္ ၂ Adfly မွာ 5 seconds ေလာက္ေစာင့္ ေပးပါ။
အဆင့္ ၃ << SKIP AD>> ကို ႏွိပ္ေပးပါ။
အဆင့္ ၄ Download link က်လာပါလိမ့္မယ္။
အဆင့္ ၅ ဖိုင့္ေလးကိုေဒါင္းေပးလိုက္ပါ။
အဆင့္ ၆ အဆင္ေျပပါသြားျပီး ခိခိ


Followers