ကြ်န္ေတာ္ pfsense အေၾကာင္းေလးေရးဖို႔စဥ္းစားေနတာၾကာပါပီ...ကဲ ခုေတာ႔
pfsense ေလးကို install ေလးလုပ္ၾကည့္ရေအာင္ VMware ေလးသံုးပီးေတာ႔...
Minimum hardware requirements:
Pentium II
128MB RAM
Hard Drive
Optical Drive (For installation)
2 Network Interface Cards
ဒါေတြကေတာ႔ VMware နဲ႔မသံုုးရင္ေတာ႔လိုတာေပါ႔ေနာ္...
ခုေတာ႔အဲ႔ဒါေတြ မစဥ္းစားနဲ႔ေတာ႔ သြားစမ္း..:P
အဲအဲေမ႔လို႔မေျပာခင္
pfsense ဆိုတာ ဘယ္လိုမ်ိဳးေလးလဲအရင္ျပမယ္ေနာ္...ကြ်န္ေတာ္ယူသံုးေနတဲ႔
serverက pfsense
နဲ႔ကာထားတာဗ်...အဲ႔ေတာ႔သူ႔ပံုေလးကိုျပမယ္..သူလုပ္ထားတာေတာ႔မလွဘူး..ၾကည့္ၾကည့္ေနာ္
သူက
လိုင္းကို connect လုပ္ရင္ password မေတာင္းဘူး...web page ေခၚမွ
အဲ႔လိုlogin screen ေပၚတာ install လုပ္ေတာ႔မယ္ေနာ္...VMware ေပၚမွာ...
VMware
version
ကေတာ႔ႀကိဳက္ရာသံုးလို႔ရပါတယ္...နည္းနည္းေတာ႔ကြာသြားမွာေပါ႔ေလ...VMware
ကေတာ႔ကိုယ့္ဖာသာကိုယ္ပဲရွာေဒါင္းလိုက္ေတာ႔ေနာ္...
အရင္ဆံုး pfsense ကို http://files.bgn.pfsense.org/mirror/downloads/ မွာ ကိုယ္နဲ႔ကိုက္တာေရြးပီးေဒါင္းလိုက္...
ပီးရင္VMware ကိုဖြင္႔
Create A New Virtual Machine ကိုႏွိပ္
Browse မွာ image ဖိုင္ေရြးေပး
ပီးရင္ Next
Guest Operation system မွာ other ကို ေရြး
version မွာ ေတာ႔ကြ်န္ေတာ္က 64 bit မို႔လို႔ FREE BSD-64bitကိုေရြးလိုက္တယ္
ပီးရင္ next
Customize hardware မွာ ႏွိပ္...processor ကို 2 ေျပာင္း
ဒီအဆင္႔က နည္းနည္းေတာ႔ရႈပ္တယ္.သူက interface ႏွစ္ခု ဖန္တီးေပးရတာဆိုေတာ႔
ပံုေလးၾကည့္မွရွင္းမွာ..Network Adapter ေပၚမွာ click ပီးရင္ Bridge...မွာ အစက္ေလးေပး
ပီးရင္ ဘယ္ဘယ္ေအာက္နားက add မွာ ႏွိပ္ network adapter ကိုေရြး ..ပီးရင္ပထမ တစ္ခုလိုပဲ Bridge...မွာ အစက္ေလးေပး
finish,close အကုန္ႏွိပ္
ပီးရင္ play virtual machine ကိုႏွိပ္
boot မွာေတာ႔ default ကိုပဲေရြးပါ...enter ေခါက္ပါ...စကၠန္႔ေရပီးသူ႔ဖာသာသူလဲ၀င္သြားႏိုင္ပါတယ္
loading ေတြဆြဲပီးလို႔... installer ဆိုတဲ႔စကားလံုးပါလာရင္ i ကိုႏွိပ္ပါ
ေအာ္ စကားမဆက္ေျပာရဦးမယ္...ဒါ install လုပ္ေနတာေနာ္..live နဲ႔သြားေနတာ မဟုတ္ဘူးေနာ္..
အျပာေရာင္ box ေလးေပၚလာရင္ Accept These Settingsကိုေရြး တျခားsettings ေတြကေတာ႔ သူငယ္ခ်င္းတို႔ေျပာင္းခ်င္လဲေျပာင္းႏိုင္ပါတယ္ေနာ္
Quick Easy Install
အဲအဲ...အဲ႔ဒါ boot တက္ပီး run ရင္ အေရးႀကီးတယ္...harddisk ကိုဖ်က္မွာ..ဒီမွာက vmware သံုးေနတာဆိုေတာ႔ဘာမွေတာ႔မျဖစ္ဘူး..
Standard Kernel လုပ္ပီးရင္
loading ေလးေတြတက္ပါမယ္
ပီးရင္ reboot ႏွိပ္
ျပန္တက္လာရင္ boot ျပန္တက္မယ္...ဘာမွမလုပ္နဲ႔သူ႔ဖာသာသူလုပ္သြားလိမ္႔မယ္
enter ေလးေတြေတာ႔ေခါက္ေခါက္ေပး
ေအာက္ က ပံု အဆင္႔ကို ေရာက္ရင္ n ႏွိပ္
ပီးရင္ Lan နဲ႔ Wan ကို interface name ေပး
error တက္တတ္ပါတယ္...a ေလးရိုက္ပီး enter ေခါက္ ေခါက္ေပးပါ...ေအာက္က ပံုေလးလို
ေပၚလိုပီဆိုရင္ y လို႔ႏွိပ္ေပးပါ..
သူ႔ဖာသာသူLoading ေလးတက္သြားပီး option ေလးေတြေပၚလာပါလိမ္႔မယ္..ကိုယ္ႀကိဳက္တ႔ဲ option
ကိုေျပာင္းႏိုင္ပါတယ္
ပီးရင္ေတာ႔ေအာက္ကပုံအတိုင္း Windows ေပၚမွာ Lan က ip ကို browser မွာရိုက္ေခၚပါ..
username-admin
password-pfsense
ကဲ VMware ေပၚမွာ pfsense installtion ပီးပါပီေနာ္...
ေအာက္မွာ အခ်ပ္ပိုအေနနဲ႔ အသံုးျပဳလို႔ရေသာ feature အခ်ိဳ႕ကို ရွင္းျပပါ့မယ္ ယခုေအာက္တြက္ေဖာ္ျပေသာ features
မ်ားဟာ command line သုံးစရာမလိုဘ ဲ web interface မွေနၿပီး အသုံးျပဳလို႔ ရပါတယ.္ .ေနာက္ထပ္လည္း features
မ်ားထပ္ထြက္လာပါလိမ့္မည္…
-Firewall
-source and destination ip ,ip protocol,source and distination port,tcp and udp traffic မ်ားကိုfilter
ျပဳလုပ္အသံုးျပဳႏိူင္ပါသည္..
-rule ေတြသတ္မွတ္ၿပီး အသံုးျပဳလို႔ရပါသည္
-FreeBSD and Linux စက္မ်ားကို အင္တာနက္ေပးသံုးမယ္..Window စက္မ်ားကိုေပးမသံုးဘူး အစရိွသျဖင့္ Operation system
initiating ကိုလည္း Filter ျပဳလုပ္ၿပီး အသံုးျပဳႏိူင္ပါသည္..ဒီမွာၾကည့္ပါ http://lcamtuf.coredump.cx/p0f.shtml
-သတ္မွတ္ထားေသာ rule ေတြရဲ႕ traffice မ်ားကို log လုပ္မလား မလုပ္ဘူးလား အစရိွသျဖင့္အသံုးျပဳႏိူင္..
-Load balancing,failover,multiple Wan အစရိွသျဖင့္ routing ျဖင့္ပတ္သတ္ေသာ rule မ်ားကိုလည္း
အဆင္ေျပစြာအေကာင္းမြန္ဆံုး routing လုပ္ေဆာင္ေပးပါတယ္..
-multiple public ips နဲ႔ numerous servers ေတြအသံုးျပဳရမည့္ ips မ်ားကို grouping ,naming of ips,networs,ports
မ်ားကိုလည္း အလြယ္တကူGroup မ်ားတည္ေဆာက္ၿပီး rule မ်ားထည့္သြင္းအသံုးျပဳႏိူင္ပါတယ္..
-Layer 2 Firewall အျဖစ္လည္းအသံုးျပဳႏိူင္ပါတယ္..interfaces bridge ျပဳလုပ္ျခင္းဌင္း trafficၾကားတြင္ Filterျပဳလုပ္ျခင္း..Ip-less
မ်ားတြင္လည္း Firewall အသံုးျပဳႏိူင္ပါတယ္..
-အျခားေသာ attack , tcp packets drop အစရိွေသာ အေျခအေနမ်ားအတြက္လည္း အကာအကြယ္ျဖစ္ေစမဲ့ packet normalization
ကိုလည္း Default အေနျဖင့္ pfSense တြင္ enable ျပဳလုပ္ၿပီးသားျဖစ္ပါတယ္..တကယ္လို႕NFS ကိုအသံုးျပဳသူမ်ားအေနျဖင့္
problems ၇ိွလို႔အသံုးမျပဳခ်င္လွ်င္လည္း Disable ျပဳလုပ္ႏိူင္ပါတယ္…
-တကယ္လို႔အထပ္ေဖၚျပပါ Filter မ်ားကိုအသံုးမျပဳခ်င္လွ်င္ firewall filter အား turn off ျပဳလုပ္ၿပီးလည္း အသံုးျပဳႏိူင္ပါသည္..
-Network Address Translation (NAT)
-မိမိအသံုးျပဳထားေသာ multiple public ips အတြက္ သတ္မွတ္ထားေသာ ranges အတြက္ port forwards function ပါ၀င္ပါတယ္.
-ips အတြက္သက္ဆိုင္ေသာ subnets အတြက္လည္း 1:1 NAT function ပါရိွပါတယ္..
-outbound NAT အေနျဖင့္ Wan Ip အား Traffic အသံုးျပဳထားပါတယ္..တကယ္လို႔ outbound nat function
အားအသံုးမျပဳခ်င္လွ်င္လည္း ကိုယ္တိုင္ Nat rules တစ္ခုျပဳလုပ္အသံုးျပဳႏိူင္ပါတယ္…
-internal networks မွေနရင္ public ip အားေခၚယူအသံုးျပဳခ်င္လည္း NAT Reflection ပါ၀င္သည့္အတြက္ အသံုးျပဳႏိူင္ပါတယ္..
-High Availability
-ႏွစ္ခုသို႕မဟုတ္ ပိုမ်ားတဲ့ Failover group မ်ားတည္ေဆာက္ၿပီး hardware failover ျဖစ္ခဲ့လွ်င္ကာကြယ္ႏိူင္ပါတယ္..တကယ္လို႕
interfaces တစ္ခုက fail ျဖစ္ခဲ့မယ္ဆိုရင္ဒုတိယ firewall rule တစ္ခုက active ျဖစ္ၿပီး အသံုးျပဳႏူိင္ပါတယ္…တကယ္လို႔ ပထမ
တစ္ခုျပန္ေကာင္းၿပီဆိုရင္ဒုတိယ firewall rule မွေနၿပီး ပထမ firewall rule ကိုျပန္ေျပာင္းၿပီးလည္း အသံုးျပဳႏိူင္ပါတယ္..( network
connections )အတြက္တကယ္ေကာင္းမြန္တဲ့ အလုပ္လုပ္ေဆာင္ပံုေလးျဖစ္ပါတယ္..
-Load Balancing
-outbound load balancing အေနျဖင့္ Multiple Wan connection ကို load balancing ျပဳလုပ္ေပးၿပီး failover function ျဖင့္လည္း
connection တည္ျငိမ္ေအာင္ ျပဳလုပ္ထားႏိူင္ပါတယ္..connection traffic အကုန္လံုးကေတာ့ gateway ကို
တိုက္ရိုက္သြားရန္ျပဳလုပ္ထားပါတယ္..
-Inbound Load Balancing အေနျဖင့္ multiple servers (web servers,mail servers and others)အစရိွေသာ local servers
အခ်င္းခ်င္းload balancing ျပဳလုပ္ေပးၿပီး ping requests fail ျဖစ္တာ အစရိွသည္မ်ားကို pool မွဖယ္ရွားေပးပါတယ္..
-Virtual Private Network(VPN)
-pfSense မွာဆိုရင္ vpn connection အေနျဖင့္ IPsec,OpenVPN , PPTP သံုးခု အသံုးျပဳႏိူင္ပါတယ္…
-IPsec အေနျဖင့္ standard ipsec support လုပ္ေသာ မည္သည့္ device တြင္ connecting ျပဳလုပ္ႏိူင္..site to site ဒါမွမဟုတ္
အျခားေသာ open source firewall ( m0m0wall,etc),cisco,juniper အစရိွသည္မ်ားနွင့္လည္းတြဲဖက္သံုးနူိင္ပါသည္..
-OpenVPN အေနျဖင့္ အလြန္အံ၀င္ခြင္က်ျဖစ္စြာ အသံုးျပဳႏိူင္ပါတယ္..ssl vpn အေနျဖင့္ ေကာင္းေကာင္းsupport
လုပ္ပါတယ္..အေသးစိတ္ကို http://www.openvpn.net/ ဒီမွာၾကည့္ေပးပါ..
-PPTP Server ကေတာ့လက္ရိွ popularျဖစ္ေနပါတယ္..ဘယ္ os မဆို pptp client အေနျဖင့္ တည္ေဆာက္လို႔ရပါတယ္..ဒါေပမဲ့
အခုေနာက္ပိုင္းမွာ secure မျဖစ္လို႕ဆိုၿပီး အသံုးမျပဳသင့္ပါဘူးလို႕ဆိုထားပါတယ္.. ဒီမွာၾကည့္ပါ.အေသးစိတ္
http://en.wikipedia.org/wiki/Point-to-point_tunneling_protocol
-PPPoE Server
-pfsense ကို PPPoE server အေနနဲ႔လည္းအသံုးျပဳႏိူင္ပါတယ္..PPPoE protocol နဲ႔ပတ္သတ္တဲ့ အက်ယ္ကို
http://en.wikipedia.org/wiki/Point-to-Point_Protocol_over_Ethernet ဒီမွာဖတ္ႏိူင္ပါတယ္..user မ်ားအေနျဖင့္ authentication
ျဖင့္ အသံုးျပဳႏိူင္သလို RADIUS authentication အေနနဲ႔ အသံုးျပဳႏိူင္ပါတယ္..
-Reporting and Monitoring
-RRD Graphs ဟာဆိုရင္ျဖင့္ ေအာက္ေဖာ္ျပပါ Historical information မ်ားကို ျပဳျပင္ႏိူင္ပါတယ္..
CPU utilization
Total throughput
Firewall states
Individual throughput for all interfaces
Packets per second rates for all interfaces
WAN interface gateway(s) ping response times
Traffic shaper queues on systems with traffic shaping enabled
-Real Time Information
-Historcal information ဟာအေရးၾကီးတာ မွန္ေပမဲ့ တစ္ခါတစ္ေလေတာ့ Real time information ဟာလည္း အေရးၾကီးပါတယ္..
-SVG graphs ဟာဆိုရင္ေတာ့ အသီသီးေသာ Interface မ်ားအား အမွန္တကယ္ ျဖတ္သန္းလုပ္ေဆာင္ေနမွဳမ်ားအား Real time
အေနျဖင့္ျပသေပးပါတယ္..
-Traffic shaper user မ်ားအေနျဖင့္ the status -> Queues screen provides a real time display of queue usage using
AJAX updated gauges.
-ပထမဆံုး page မွာဆိုရင္ AJAX gauges ရဲ႕ CPU,memory,swap ,disk usage,state table size တို႔အား real time ေတြ႔
ျမင္ႏိူင္ပါတယ္..
-Dynamic DNS
-Dynamic DNS မွာဆိုရင္ျဖင့္ register ျပဳလုပ္ထားေသာ သင့္ရဲ႕ public ip ႏွင့္ dynamic DNS service providers တို႔အား pfSense
ျဖင့္တြဲဖက္အသံုးျပဳႏိူင္ပါတယ္..ေလာေလာဆယ္အဆင္ေျပတာေတာ့
ေအာက္ေဖာ္ျပပါ..DNS service providers မ်ားျဖစ္ပါတယ္.. DNS-O-Matic
,DynDNS , DHS , DNSexit , DyNS , easyDNS , freeDNS , HE.net , Loopia ,
Namecheap, No-IP , ODS.org , OpenDNS , Route 53 , SelfHost ,ZoneEdit
-Captival Portal
-captival portal အေနျဖင္ ့network access ရရိွရန္ အတြက္ redirection အေနျဖင့္ authentication page မွတဆင့္
ရယူျခင္းျဖစ္ပါတယ္..တနည္းအားျဖင့္ hotspot networks ေတြအတြက္ျဖစ္ပါတယ္.. wireless နဲ႔ internet access အား
authentication ျဖင့္အသံုးျပဳခ်င္ေသာ ေနရာမ်ားတြက္လည္း အသံုးျပဳႏိူင္ပါတယ္..Captive portal technology အားအက်ယ္ျဖင့္
သိရိွေလ့လာ လိုလွ်င္.. http://en.wikipedia.org/wiki/Captive_portal သြားေရာက္ေလ့လာႏိူင္ပါတယ္..ေအာက္ေဖာ္ျပပါ Features
မ်ားကေတာ့ pfSense Captive Portal မွာပါ၀င္ေသာ အရာမ်ားျဖစ္ပါတယ္..
-client မ်ားအား connection limit ျပဳလုပ္ျခင္း..client မ်ားမွေနၿပီး splash page အား authentication မျပဳလုပ္ဘဲနဲ႔
အသံုးျပဳမရႏိူင္ပါ..( login username password မွန္မွသာ ဆက္လက္အသံုးျပဳလို႔ရ)
-client မ်ားအား အခ်ိန္မိနစ္ျဖင ့္ ဘယ္ေလာက္ဘ ဲ Idle time ေပးမယ.္ .အစရိွသျဖင ့္ idle time သတ္မွတ္ေပးႏိူင္ပါတယ.္
-client မ်ားအကုန္လံုး အသံုးျပဳရန္ေပးထားေသာ အခ်ိန္ကုန္လွ်င္ Force disconnect ျပဳလုပ္ေပးျခင္း..
-logon ျပဳလုပ္ရန္ pop up window ႏွင့္ ဌင္းတြင္ log off button ပါ၀င္ျခင္း
-captive portal အေနျဖင့္ authentication ျဖင့္၀င္ေရာက္လာေသာ user မ်ားလိုခ်င္သည့္ URL သို႔ forcefully redirected
ျပဳလုပ္ေပးျခင္း..
-MAC filtering ခံၿပီး အသံုးျပဳခ်င္လည္း ေနာက္တစ္ဆင့္အေနနဲ႔ ဆက္လက္အသံုးျပဳႏိူင္ပါတယ္..
-Authentication အေနျဖင့္သံုးမ်ိဳး ပါရိွပါတယ္..
-no authentication ဆိုတာကေတာ့ အသံုးျပဳသူ user ဟာ portal page ကို clicks ၿပီး ၀င္ေရာက္အသံုးျပဳႏိူင္ပါတယ္..
-local user database တည္ေဆာက္ၿပီးuser မ်ားအား ထည့္ၿပီး authentication ျပဳလုပ္ အသံုးျပဳႏိူင္ပါတယ္..
-Radius authentication method ကေတာ့ corporate နဲ႔ ISPs မ်ားအသံုးျပဳပါတယ္..Microsoft Active Directory နဲ႔အျခားေသာ
Radius server မ်ားႏွင့္တြဲၿပီး Authenticate ျပဳလုပ္ခိုင္းၿပီး အသံုးျပဳႏိူင္ပါတယ္..
-Radius ရဲ႔လုပ္ေဆာင္ႏိူင္စြမ္းေတြကေတာ့ Forced re-authentication ( authentication မမွန္လွ်င္ အသံုးျပဳမရျခင္း) Accounting
ႏွင့္သက္ဆိုင္ေသာ updatesမ်ားကို ေပးပို႔ႏိူင္ျခင္း..captive portal မွာ username password အျပင္ client’s MAC address
ျဖင့္လည္း authenticate အားျပင္ဆင္ႏိူင္ပါတယ္…Radius server မွမ်ားျပားေသာ function အား configure
ျပဳလုပ္အသံုးျပဳႏိူင္ပါတယ္..
-portal မွာ HTTP သံုးမလား HTTPS သံုးမလား ေရြးခ်ယ္ အသံုးျပဳႏိူင္ပါတယ္..
-portal အားေက်ာ္ျဖတ္ၿပိး တန္းၿပီးအသံုးျပဳလို႔ရေစရန္ White listed ျပဳလုပ္ေပးထားႏိူင္ေသာ function ပါရိွပါတယ္..
-File Manger ကေတာ့ ဓာတ္ပံုမ်ားကို မိမိ့ရဲ႕ portal pages မွာ upload ျပဳလုပ္ႏိူင္မွာျဖစ္ပါတယ္…
-DHCP Server and Relay
-pfSense မွာ DHCP server ႏွင့္ Relay function ကိုလည္း အသံုးျပဳႏိူင္ပါတယ္..
Credit
MgminLukaLay
ဒါေလးက ကြ်န္ေတာ႔ေနရာ
Sep 6, 2014
Sep 4, 2014
Android application ေတြကို fullversion ျဖစ္ေအာင္လုပ္ေပးမယ္ Lucky Patcher v4.6.2 Apk
Android application ေတြကို fullversion ျဖစ္ေအာင္လုပ္ေပးမယ့္LuckyPatcher ေဆာ့ဖ္ဝဲ ေလးတစ္ခုပါ။
တခ်ိဳ႔ေသာAndroid apk ေတြဟာဆိုရင္"လိုင္စင္ကီး"ေတာင္းတာတို႔ဝယ္ခိုင္းတာတို႔ ျပီးေတာ့မ်က္စိေနာက္
စရာေၾကာ္ျငာေတြပါေနတာမ်ိဳးေတြရွိတတ္ပါတယ္။အဲလိုမ်ဳိးျဖစ္ေနတဲ့apkေတြကိုအခုဒီsoftwareေလးကFull
Versionျဖစ္ေအာင္ ျပဳလုပ္ေပးပါလိ္မ့္မယ္။Android apk ေတြကို လိုင္စင္ကီးေတာင္းရင္ ဒါေလးနဲ႔ ထပ္မေတာင္းေတာ့ေအာင္ ျဖဳတ္ေပးလို႔ရပါတယ္။ဒါ့အျပင္ Google Ads ျဖဳတ္တာတို႔ License Verfication ျဖဳတ္တာတို႔မွာပါေတာ္ေတာ္အဆင္ေျပေစပါတယ္။android apk ေတြကို full version ျဖစ္ေအာင္လုပ္ေပးႏုိင္တဲ့ေဆာ့ဖ္ဝဲ လို႔ေတာင္မွနာမည္ၾကီးပါတယ္။အဲ တခုရွိတာက ဒီေဆာ့ဖ္ဝဲကိုသံုးမယ္ဆိုရင္ေတာ့မိမိတို႔ဖုန္းဟာRooted ျဖစ္ထားရပါမယ္Root ျဖစ္ျပီးသားဖုန္းေတြပဲအသံုးျပဳလို႔ရမွာပါ။
apk file size 3.92 MB ေလာက္ပဲရွိျပီး androidversion2.0 ႏွင့္အထက္ဖုန္းမ်ား ဒီေဆာ့ဖ္ဝဲ ကိုအသံုးျပဳႏုိင္ပါတယ္။Ram manager pro ေဆာ့ဖ္ဝဲအားလိုင္စင္ျဖဳတ္ပံုကိုေအာက္မွာပံုနဲ႔႐ွင္းျပေပးထားပါတယ္ ။ အရင္ဆံုးLucky pacther apk ကိုဖြင့္ဝင္ပါ။ၿပီးရင္ကိုယ္လိုင္စင္ျဖဳတ္မယ့္apkကိုေရြးလိုက္ ပါ။က်ေနာ္အခု Ram manager pro ေဆာဖ့္ဝဲအားလိုင္စင္ျဖဳတ္ပံုကိုဥပမာ႐ွင္းျပေပးပါမယ္။Post ကိုၾကိုက္တယ္ဆိုရင္ share ျဖင့္ကူညီးေပးပါဗ်ာ။
Lucky Patcher is a great Android tool to remove ads, modify Permissions, bypass premium applications license verification, and more.
You can use this patcher to break some apps Android Market License Verification or other Verifications.
To use this application, you need a rooted device.
All credits to ChelpuS.
Know:
Although stable, functioning of Lucky Patcher can’t be guaranteed at 100%.
So you are solely responsible of use of this application.
Under no circumstances will Netbew be responsible for any problems caused to your device (rebooting loop, unstable system, etc…).
တခ်ိဳ႔ေသာAndroid apk ေတြဟာဆိုရင္"လိုင္စင္ကီး"ေတာင္းတာတို႔ဝယ္ခိုင္းတာတို႔ ျပီးေတာ့မ်က္စိေနာက္
စရာေၾကာ္ျငာေတြပါေနတာမ်ိဳးေတြရွိတတ္ပါတယ္။အဲလိုမ်ဳိးျဖစ္ေနတဲ့apkေတြကိုအခုဒီsoftwareေလးကFull
Versionျဖစ္ေအာင္ ျပဳလုပ္ေပးပါလိ္မ့္မယ္။Android apk ေတြကို လိုင္စင္ကီးေတာင္းရင္ ဒါေလးနဲ႔ ထပ္မေတာင္းေတာ့ေအာင္ ျဖဳတ္ေပးလို႔ရပါတယ္။ဒါ့အျပင္ Google Ads ျဖဳတ္တာတို႔ License Verfication ျဖဳတ္တာတို႔မွာပါေတာ္ေတာ္အဆင္ေျပေစပါတယ္။android apk ေတြကို full version ျဖစ္ေအာင္လုပ္ေပးႏုိင္တဲ့ေဆာ့ဖ္ဝဲ လို႔ေတာင္မွနာမည္ၾကီးပါတယ္။အဲ တခုရွိတာက ဒီေဆာ့ဖ္ဝဲကိုသံုးမယ္ဆိုရင္ေတာ့မိမိတို႔ဖုန္းဟာRooted ျဖစ္ထားရပါမယ္Root ျဖစ္ျပီးသားဖုန္းေတြပဲအသံုးျပဳလို႔ရမွာပါ။
apk file size 3.92 MB ေလာက္ပဲရွိျပီး androidversion2.0 ႏွင့္အထက္ဖုန္းမ်ား ဒီေဆာ့ဖ္ဝဲ ကိုအသံုးျပဳႏုိင္ပါတယ္။Ram manager pro ေဆာ့ဖ္ဝဲအားလိုင္စင္ျဖဳတ္ပံုကိုေအာက္မွာပံုနဲ႔႐ွင္းျပေပးထားပါတယ္ ။ အရင္ဆံုးLucky pacther apk ကိုဖြင့္ဝင္ပါ။ၿပီးရင္ကိုယ္လိုင္စင္ျဖဳတ္မယ့္apkကိုေရြးလိုက္ ပါ။က်ေနာ္အခု Ram manager pro ေဆာဖ့္ဝဲအားလိုင္စင္ျဖဳတ္ပံုကိုဥပမာ႐ွင္းျပေပးပါမယ္။Post ကိုၾကိုက္တယ္ဆိုရင္ share ျဖင့္ကူညီးေပးပါဗ်ာ။
Lucky Patcher is a great Android tool to remove ads, modify Permissions, bypass premium applications license verification, and more.
You can use this patcher to break some apps Android Market License Verification or other Verifications.
To use this application, you need a rooted device.
All credits to ChelpuS.
Know:
Although stable, functioning of Lucky Patcher can’t be guaranteed at 100%.
So you are solely responsible of use of this application.
Under no circumstances will Netbew be responsible for any problems caused to your device (rebooting loop, unstable system, etc…).
Operating System အားလံုးရဲ႕ Password ကို ေက်ာ္ျဖတ္ႏိုင္မယ့္ နည္းမ်ား

Operating System အားလံုးရဲ့ Password ကို ေက်ာ္ျဖတ္ နိုင္မယ့္ နည္းမ်ား ရွိပါတယ္။ Windows, Linux, Mac OS X တို႔
မွာ Password နဲ႔ ကာကြယ္ ထားရံုနဲ႔ ဖိုင္မ်ားကို ကာကြယ္ နိုင္ျခင္း မရွိပါဘူး။ ဖိုင္မ်ားကို Encrypt လုပ္ထား မွသာ စိတ္ခ်ရ
တယ္ ဆိုတာ ကို သတိ ျပဳပါ။ ဒီ နည္းလမ္း မ်ားက သင့္ Operating System ရဲ႕ Password ကို ေမ့သြား လို႔ ျဖစ္ ျဖစ္ သင့္
Operating System ကို အျခားသူမ်ား ေဖာက္ထြင္း မရေအာင္ ကာကြယ္ဖို႔ ျဖစ္ျဖစ္ အသံုး ၀င္မွာပါ။
Windows
Windows Password ကို Reset လုပ္ႏုိင္တဲ့ နည္းမ်ားစြာ ရွိပါတယ္။ Windows က Password Reset Disk ျပဳလုပ္ဖို႔ ပံ့ပိုး
ေပး ထားပါတယ္။ ဒါက Official Tool ပါ။ Password မေမ့ခင္ Password Reset Disk တစ္ခုျပဳလုပ္ ထားရမွာပါ။
Official Tool မဟုတ္တဲ့ Tools ေတြမ်ားစြာ ရွိပါ ေသးတယ္။ ဥပမာ အေနနဲ႔ Offline NT Password & Registry Editor ကို
အသံုး ျပဳလို ႔ရပါ တယ္။ ပထမဆံုး Offline NT Password & Registry Editor ကို Disc ဒါမွ မဟုတ္ USB Drive မွာ ထည့္
သြင္းရမွာ ျဖစ္ၿပီး အဲဒီ Disc or USB Drive နဲ႔ ကြန္ျပဴတာကို Boot တက္ရပါမယ္။ အဲဒီ Tool က Windows Registry ကိုျပဳ
ျပင္ေပးၿပီး Password ကို ရွင္းလင္းေပးမွာပါ။
Windows 8 ကို Microsoft Account နဲ႔ အသံုးျပဳ ရင္လည္း Administrator Accont ရဲ႕ Password ကို Reset လုပ္ႏိုင္ မွာ
ျဖစ္ပါတယ္။ ဒီ နည္းလမ္း ေတြကို ကာကြယ္ဖို႔အတြက္ သင့္ကြန္ျပဴတာ ရဲ႕ BIOS ကို Password နဲ႔ ကာကြယ္ ထားရ မွာပါ။
ဒီလို ကာကြယ္ ထားရင္ External Device ေတြ ကေန Boot တက္လို႔ မရ ေတာ့ပါဘူး။ သင့္ရဲ႕ Windows System Drive
ကို BitLocker လို Tool မ်ိဳးနဲ႔ Encrypt လုပ္ထား မယ္ဆိုရင္ Registry ကို ျပင္လို႔ မရေအာင္ ကာကြယ္ ထားႏုိင္ပါတယ္။
Encryption လုပ္ျခင္း ကသာ သင့္ရဲ႕ ကြန္ျပဴတာကို ကာကြယ္ဖို႔ တစ္ခု တည္းေသာ နည္းလမ္းပါ။
Linux
ဒီ ေနရာ မွာေတာ့ Ubuntu ကို အေကာင္း ဆံုး ဥပမာ ေပးပါ မယ္။ Ubuntu က သူ႔ရဲ့ Default Grub Boot Menu မွာ Re
covery Mode ကို ထည့္ သြင္း ေပး ထား ပါတယ္။ Advanced Options ကေန Recovery Mode ကို ေရြး ခ်ယ္ ရမွာပါ။
Menu ကို မေတြ႔ ရရင္ Boot တက္ ခ်ိန္မွာ Shift Key ကို ဖိထား လိုက္ ရင္ Menu ေပၚလာ မွာပါ။ ဒါ ဆိုရင္ Root Shell
Prompt ကို တိုက္ရုိက္သံုးႏုိင္ၿပီျဖစ္ၿပီး Password ကို ဖ်က္ပစ္ႏုိင္ပါၿပီ။ Grub Boot Menu ကို Lock လုပ္ထားရင္ Linux
Live Media ကို သံုးၿပီး Password ကို ဖ်က္ပစ္ႏိုင္ပါတယ္။
ထပ္ သတိေပး ခ်င္တာက Encryption လုပ္ထား မွသာ သင့္ ကြန္ျပဴတာကို အေကာင္းဆံုး ကာကြယ္ႏုိင္ တယ္ဆိုတာပါ။
ဒီေနရာမွာ Ubuntu ကို ဥပမာေပးထားပါတယ္။ Linux Distribution အားလံုးနီးပါးဟာ Grub ကို သံုးၾကပါတယ္။
Mac OS X
Macs မွာ Password Reset Tool ဟာ Built-In ပါရွိၿပီး အလြယ္ တကူ သံုးႏုိင္ ပါတယ္။ Recovery Mode ထဲ ၀င္သံုးရမွာ
ပါ။ ဒီလိုလုပ္ဖို႔ Apple Menu ကို ႏွိပ္ၿပီး Restart ကို ေရြးခ်ယ္ပါ။ Boot တက္လာရင္ Command + R ကို ဖိထားပါ။ ဒါဆို
ရင္ Recovery Mode ထဲေရာက္သြားမွာျဖစ္ပါတယ္။
Recovery Mode ထဲမွ Utilities Menu ကို နွိပ္ပါ။ Terminal ကို ေရြးၿပီး resetpassword လို႔ ရိုက္ ပါ။ အန္းတား နွိပ္ ပါ။
Reset Password Utility ကို ေတြ႔ရ မွာ ျဖစ္ၿပီး Mac ကြန္ျပဴ တာမွ ဘယ္လို User Account ကိုမဆို Reset လုပ္ႏုိင္ပါၿပီ။
အဲဒီ Tool ကို Mac OS X Installation Disc ကေနလည္း သံုးႏုိင္ ပါေသးတယ္။
သင့္ Mac ရဲ႕ Password ကို Reset လုပ္ခံ ရျခင္းမွ ကာကြယ္ ဖို႔ FileVault Disk Encryption ကို Enable လုပ္ႏုိင္ သလို
Recovery Mode ထဲမွာ Firmware Password ကို သတ္မွတ္ႏိုင္ ပါတယ္။ ႏွစ္မ်ိဳး စလံုးကို လည္း ျပဳလုပ္ႏိုင္ ပါတယ္။
Chrome OS
သင့္ Chromebook ရဲ႕ User Account Password ဟာ သင့္ရဲ႕ Google Account Password ပါပဲ။ Web ေပၚမွ Google
Account Password ကို Reset လုပ္ရင္ Chromebook ရဲ႕ User Account Password ကို ေျပာင္းလဲႏုိင္ မွာပါ။
သင့္ရဲ႕ Google Password ကိုေမ့သြားလို႔ Chromebook ကို Signin လုပ္လို႔မရဘူးဆိုရင္ ဒါမွမဟုတ္ Chromebook ပိုင္
ရွင္ အေဟာင္းရဲ႕ Password ကို မသိဘူး ဆိုရင္Chromebook ရဲ႕ Signin Screen ကို သြားပါ။ Ctrl+Shift+Alt+R ကို
တစ္ၿပိဳင္နက္ နွိပ္ပါ။ ဒါဆိုရင္ Powerwash နဲ႔ Chromebook ကို Factory Reset လုပ္ဖို႔ ေပၚလာ မွာပါ။ Reset လုပ္ၿပီးရင္
Chromebook ကို သင့္ရဲ႕ Google Account နဲ႔ Login ၀င္လို႔ ရပါၿပီ။ ဒီလို လုပ္ ရင္ Chromebook ပိုင္ရွင္ အေဟာင္း ရဲ႕
ေဒတာအားလံုးကို ဖ်က္ပစ္မွာျဖစ္ေပမယ့္ အြန္လိုင္းမွာ သိမ္းထားေပးမွာျဖစ္ပါတယ္။
Chromebook မွာ ပိုင္ရွင္ရဲ႕ Password မသိဘဲနဲ႔ ဖိုင္ေတြကို သံုးလို႔မရပါဘူး။ ဖိုင္အားလံုးကို Default အားျဖင့္ Encrypt
လုပ္ထားတာပါ။
Android
သင့္ Android ရဲ႕ Lock Screen Code ကို ေမ့သြားရင္ Reset လုပ္ႏုိင္ ပါတယ္။ Password , PIN, Pattern ကို အႀကိမ္
အနည္းငယ္ မွန္းဆ ထည့္ ၾကည့္ လို႔ မမွန္ ေသးရင္ “Forgot Password”, “ Forgot PIN” , “ Forgot Pattern” ဆိုတဲ့
Option မ်ားကို ေတြ႔ရမွာပါ။ အဲဒီ Option တစ္ခုကိုေရြးခ်ယ္ၿပီး သင့္ရဲ႕ Android မွာ ခ်ိတ္ဆက္ထားတဲ့ Google Account
ရဲ႕ Username, Password ကိုထည့္ေပးရင္ Android ရဲ႕ Lock Screen ကို ေက်ာ္ျဖတ္ႏုိင္မွာပါ။
Google Account မရွိဘူး ဆိုရင္လည္း Lock Screen ကို ေက်ာ္ျဖတ္ႏုိင္တဲ့ နည္းေတြ ရွိပါတယ္။ အဲဒီနည္း ေတြကေတာ့
USB Debugging ကို Enable လုပ္ထားတဲ့ Android Device ေတြမွာဆိုရင္ လြယ္ကူပါတယ္။ Android ကို ကြန္ျပဴတာနဲ႔
ခ်ိတ္ဆက္ၿပီး ADB Command မ်ားနဲ႔ Lock Screen ကို ေက်ာ္ျဖတ္ႏုိင္ပါတယ္။
ေနာက္တစ္နည္းက Android ရဲ႕ Recovery Mode ထဲကေန Factory Reset ခ်ျခင္းျဖင့္ Password ကို ေက်ာ္ျဖတ္ႏိုင္ပါ
တယ္။ ဒီလို လုပ္ရင္ Android ရဲ႕ ေဒတာ မ်ားကို ဖ်က္ေပး မွာ ျဖစ္ၿပီး စက္ရံုထုတ္ အေျခ အေနကို ေရာက္ရွိ သြား မွာပါ။
Android မွာ Recovery Mode ထဲ ၀င္ဖို႔ ႏွိပ္ ရတဲ့ ကီးမ်ား ဟာ Device တစ္ခုနဲ႔ တစ္ခု မတူညီ ပါဘူး။ အဲဒီ အတြက္ မိမိ
Device အလိုက္ အင္တာနက္မွာ ရွာေဖြပါ။
iOS
iPhones, iPads, iPod Touch မ်ားမွာ Password ကို Reset ခ်လို႔ မရေအာင္ ျပဳလုပ္ ထားတာပါ။ Android လို မဟုတ္ဘဲ
သင့္ရဲ့ Apple ID နဲ႔ Password ကို Reset ခ်လို႔မရပါဘူး။ သင့္ iOS Device ရဲ့ Password ကိုေမ့သြားရင္ Factory Reset
ခ်မွရမွာပါ။
Factory Reset ခ်ရင္ ေဒတာမ်ားကို ဖ်က္ပစ္မွာ ျဖစ္ေပမယ့္လည္း သင့္ Device မွ ေဒတာမ်ားကို Apple Account နဲ႔ Sync
လုပ္ထားရင္ iCloud Bakcups ကေန ျပန္လည္ရယူႏုိင္ပါတယ္။ Factory Reset ခ်ၿပီးလို႔ ေဒတာ မ်ားကို ျပန္လည္ရယူႏုိင္
တဲ့ ေနာက္နည္းက Apple Device ကို ကြန္ျပဴတာမွ iTunes မွာ Backup လုပ္ထား တယ္ဆိုရင္ Device ကို ကြန္ျပဴ တာနဲ႔
ခ်ိတ္ဆက္ၿပီး iTunes Backup ကေန ျပန္လည္ရယူႏုိင္ပါတယ္။
iDevice ကို Recovery Mode ထဲ ကေန Reset ခ်ဖို႔ Device ကို ပိတ္ၿပီး Home Button ကို ဖိထား ပါ။ Device ကို USB
Cable ကေန ကြန္ျပဴတာနဲ႔ ခ်ိိတ္ဆက္ပါ။ iTunes အလိုလို မပြင့္ရင္ ဖြင့္ပါ။ iTunes က Recovery Mode ထဲေရာက္ေနတဲ့
Device ကို ေတြ႔ေနတယ္လို႔ အသိေပးမွာ ျဖစ္ၿပီး Factory Reset ခ်ေပးမွာ ျဖစ္ပါတယ္။
Password ေတြဟာ လံုျခံဳမႈမရွိဘူးဆိုတာ စာဖတ္သူသိရွိပါၿပီ။ အဲဒီအတြက္ အေရးႀကီး ေဒတာမ်ားကို Encrypt လုပ္ထား
သင့္ေၾကာင္း တင္ျပလိုက္ပါတယ္။
Myanmar Digital Life Journal
Windows Repair v2.8.6 Portable Full Version
Windows
Update, Windows Firewall ႏွင့္ registry errors and file permissions
စသည့္ Windows problems ျဖစ္လာပါက မိမိ၀င္းဒိုးကိုျပန္ျပီး Repair
လုပ္ေပးႏိုင္တဲ့ full ( Portable ) ေဆာ့စ္၀ဲေလးပါ
။ေနာက္ထပ္လုပ္ေဆာင္ေပးႏိုင္တာေတြအမ်ားၾကီးပါ။ဘာေတြဆက္ျပီးလုပ္ေဆာင္ေပးႏိုင္တယ္ဆုိတာေအာက္ဆက္ဖတ္
လိုက္ပါ။၀င္းဒိုးအားလံုး (32 & 64 Bit) အကုန္သံုးႏိုင္ပါတယ္။
Windows Repair is an all-in-one repair tool to help fix a large majority of known Windows problems including registry errors and file permissions as well as issues with Internet Explorer, Windows Update, Windows Firewall and more. Malware and installed programs can modify your default settings. With Tweaking.com - Windows Repair you can restore Windows original settings.
Windows Repair can do the following:
Reset Registry Permissions
Reset File Permissions
Register System Files
Repair WMI
Repair Windows Firewall
Repair Internet Explorer
Repair MDAC & MS Jet
Repair Hosts File
Remove Policies Set By Infections
Repair Icons
Repair Winsock & DNS Cache
Remove Temp Files
Repair Proxy Settings
Unhide Non System Files
Repair Windows Updates
and more...
။ေနာက္ထပ္လုပ္ေဆာင္ေပးႏိုင္တာေတြအမ်ားၾကီးပါ။ဘာေတြဆက္ျပီးလုပ္ေဆာင္ေပးႏိုင္တယ္ဆုိတာေအာက္ဆက္ဖတ္
လိုက္ပါ။၀င္းဒိုးအားလံုး (32 & 64 Bit) အကုန္သံုးႏိုင္ပါတယ္။
Windows Repair is an all-in-one repair tool to help fix a large majority of known Windows problems including registry errors and file permissions as well as issues with Internet Explorer, Windows Update, Windows Firewall and more. Malware and installed programs can modify your default settings. With Tweaking.com - Windows Repair you can restore Windows original settings.
Windows Repair can do the following:
Reset Registry Permissions
Reset File Permissions
Register System Files
Repair WMI
Repair Windows Firewall
Repair Internet Explorer
Repair MDAC & MS Jet
Repair Hosts File
Remove Policies Set By Infections
Repair Icons
Repair Winsock & DNS Cache
Remove Temp Files
Repair Proxy Settings
Unhide Non System Files
Repair Windows Updates
and more...
Network မွ တစ္ဆင့္ ကြန္ပ်ဴတာ မွာ window တင္နည္း

Client Computer ေတြသို ့Network ေပၚက တဆင့္ Windows OS Installation လုပ္တဲ့ ပုံစံကို မသိေသးတဲ့ မိတ္ေဆြမ်ား
သိရ ေလေအာင္ Remote Installation Services အေၾကာင္းကို ေျပာေပး ပါမယ္ ။
RIS Requirements
* Windows 2003 or 2000 Server
* Remote Installation Services Component
* Windows XP Professional CD
* Active Directory
* DHCP
* PXE Client တို ့ျဖစ္ၾက ပါသည္။
အထက္က လိုအပ္ခ်က္ေတြ ျပည့္စုံၿပီ ဆိုရင္ေတာ့ RIS လုပ္ငန္း စတင္လို ့ရပါၿပီ။
Windows Server 2003 or 2000 တြင္ ျပဳလုပ္ရန္ ။
ပထမ ဦးဆုံး Remote Installation Services ဆိုတဲ့ Windows Component တစ္ခု ကို ထည့္ သြင္း ေပးရ ပါမယ္ ဒီလို
ထည့္ သြင္း လို ့ရဖို ့အတြက္ Server 2003 CD or Server 2000CD ေခြကို ႀကိဳ ထည့္ ထား ဖို ့လုိအပ္ ပါသည္။ လုပ္တဲ့
ပုံစံ ကေတာ့ - Start >>> Control Panel >>> Add or Remove Programs အဲဒီ ထဲ ကမွ Add / Remove Win
dows Components ကို ေရြးပါ။ Windows Components Wizard Box လာပါမယ္ Your browser may not support
display of this image. အဲဒီ ထဲကမွ Remote Installation Services ကို အမွန္ျခစ္ ေပးပါ။ Next ကိုႏွိပ္ပါ။ Remote
Installation Services ကို Install လုပ္ေပး ေနလိမ့္မယ္ ၿပီးရင္ Complete Wizard Box က် လာပါမည္။ Finish မွာႏွိပ္
ပါ။ ဒါဆိုလွ်င္ Remote Installation Services ကို Install လုပ္တာ ၿပီးဆုံး သြားပါၿပီ။
ကြ်န္ ေတာ့္ တို႔ အခု server 2003 မွာ Remote Installation Services component ကို ထည့္ သြင္း ၿပီး ၿပီ ျဖစ္ သျဖင့္
RIS လုပ္ငန္းကို စတင္လို ့ရပါၿပီ စတင္ အသုံးျပဳပုံကေတာ့ - Start>>>run box ထဲမွာ risetup ရိုက္ ၿပီး Enter ေခါက္
ပါ ။ RIS Setup Wizard box က် လာ ပါမယ္ ။ Your browser may not support display of this image. RIS Wel
come Screen တြင္ RIS installation အပိုင္း ၿပီး ေျမာက္ ဖို ့အတြက္ လိုအပ္ခ်က္ ေတြကို ေဖာ္ျပ ထားပါတယ္။ ၿပီးလွ်င္
Next မွာႏွိပ္ပါ ။
Your browser may not support display of this image.
ဒီ အဆင့္ ေလးက ေတာ့ ကိုယ့္ server ၏ C: Drive မဟုတ္ တဲ့။ တျခား Drive letter D:, E:, စသည့္ အပိုင္း တြင္
Remoteinstall ႏွင့္ ပတ္သက္ ေသာ လုပ္ငန္း စဥ္မ်ား သိမ္းဖို႔ အတြက္ ေနရာ သတ္မွတ္ ေပးတဲ့ အပိုင္း ျဖစ္ ပါတယ္။
ထိုသို႔ သတ္မွတ္ ခ်င္ပါက Browse တြင္ႏွိပ္၍ သတ္မွတ္ နိုင္ပါသည္။ Next မွာႏွိပ္ပါ။
Your browser may not support display of this image.
ဒီအဆင့္ ကေတာ့ အခု ဖန္တီး ထားတဲ့ RIS ကို Client သို ့ခ်က္ျခင္း ေထာက္ပံမွဳ ေပးမည္ ၊ မေပး မည္ ကို ေရြး ခ်ယ္
သည့္ အပိုင္းပါ။ Next မွာႏွိပ္ပါ။
Your browser may not support display of this image.
ဒီ အဆင့္ ကေတာ့ Client မွာ အသုံး ျပဳမည့္ Windows ေခြ ရဲ့ လမ္း ေၾကာင္း ကို ေရြးခိုင္း တာပါ။ အဓိက ကေတာ့
Windows CD ထဲက i386 folder ကို Copy ကူးယူ သြားတာပါ။ win xp CD ရွိတဲ့ လမ္း ေၾကာင္း ကို ေပးၿပီး ၿပီဆို
လွ်င္ Next မွာ ႏွိပ္ပါ။
Your browser may not support display of this image.
ဒါက ေတာ့ ကိုယ္ ဖန္တီး လိုက္တဲ့ Image အတြက္ နာမည္ေလး ေပးလိုက္ တာပါ။ Next မွာႏွိပ္ပါ။
Your browser may not support display of this image.
ဒီီ အဆင့့္္ ကေတာ့့ windows image ၏ Descripiton Name ေပးတဲဲ့ ေနရာပါ။ Next မွာႏွိပ္ပါ။
Your browser may not support display of this image.
ဒီီအဆင့္ ကေတာ့ ေနာက္ ဆုံး ၿပီးဆုံး သြားတဲ့ အဆင့္ပါ။ Finish မွာႏွိပ္ပါ ။
Your browser may not support display of this image.
ဒါက ေတာ့ ေရွ့ မွာ ခ် ခဲ့တဲ့့ settings အတိုင္း Install လုပ္ေန တာပါ။
Your browser may not support display of this image.
အခု ဆိုရင္ ေတာ့ ကြ်န္ေတာ္ တို႔ ၏ Remote Installation Services Setup Wizard ကေန လိုအပ္ တာေလးေတြကို
remoteinstall folder ဖြဲ႔ၿပီး ဖန္တီးျခင္း အဆင့္ ၿပီးဆုံးလို ့သြားပါၿပီ။ Done မွာႏွိပ္ လိုက္ပါ။
အဆင္ေျပပါေစ ........... ။
From: Min Oke Kar (ဘီလူးကၽြန္းသားေလး)
★★ Demons & Dungeons Version: 1.5.2 Mod APK Unlimited Coin + Gems + Stats Point (Android Game) ★★
ခုတ္တာၿဖတ္တာ၀ါသနာပါတဲ့ေဘာဒါေတြအၾကိဳက္ေတြ႕ေစမယ့္ Demons & Dungeons Version: 1.5.2 Mod APK Unlimited Coin + Gems + Stats Point ေလးတင္ေပးလိုက္ပါတယ္ေနာ္ ။ ဒီေကာင္ေလးကေတာ့
လူသားဆန္ဆန္အေကာင္ၾကီးေတြနဲ႕တခါမွမၿမင္ဖူးတဲ့တိရိစၦာန္အေကာင္ၾကီးေတြကိုစားနဲကတိုက္ထုတ္ရ
တဲ့ဂိမ္းေလးပါပဲ Unlimited Coin ၿဖစ္ေနတာေၾကာင့္ မိမိအသံုးၿပဳ်င္တဲ့လက္နက္ေတြကိုလြယ္လြယ္ကူကူပဲ
ထုတ္ယူအသံုးၿပဳနိူင္မွာပါ ။ ဖိုင္ဆိုဒ္က 49mb ရွိၿပီး Android : 2.3 ႏွင့္အထက္ဖုန္းေတြမွာကစားႏိူင္ပါတယ္ ။
A dragon had not been seen in a Thousand years, and the old order of Dragon Slayers had all but disbanded, people lived safely in the knowledge that the greatest threats to their kingdoms and cities was gone forever.
Install APK files
Then Lets Play The Game
Android : 2.3
Market: https://play.google.com/.deadlyd
Mod: Unlimited Coin + Gems + Stats Point
★★နည္းပညာၿမိဳ႕ေတာ္★★
Facebook သံုးတဲ့သူမ်ားအတြက္ updater Version Facebook v18.0.0.0.5 - Apk For All Phone
ဖုန္းကိုင္းေဆာင္းထားတဲ့ သူေတာ္ေတာ္ မ်ားမ်ားေတာင္းထားတဲ့တြက္ Facebook
Version 18.0.0.0.5 သစ္ေလးကို က်ေနာ္တင္ေပးလုိက္ပါတယ္။ ဒီVersion ၏
လုပ္ေဆာင္းစြမ္းရည္းကေတာ့ မ်ားၾကီးပဲဗ်ာ ဓာတ္ပံုShare photos , videos,
like ,comment, posts, Text, chat ,group conversations
ေတြေကာင္းေကာင္းUplond လုပ္ေဆာင္ႏိုင္ေနာက္ Playgames,ဂိမ္းေတြကိုလည္း
ဖုန္းထဲကေကာင္းေကာင္းကစားလိုရတယ္ဆိုေတာ့ အရမ္းေကာင္းပါတယ္ဗ်ာ။
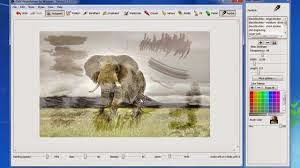
★★ GMX-PhotoPainter 2.6.0.466 + Crack (For PC)★★
ဓာတ္ပံုၿပင္႔ရတာစိတ္၀င္စားတဲ့ေဘာ္ဒါေတြအတြက္ GMX-PhotoPainter 2.6.0.466 + Crack ေလးပါဗ်ာ
ဒီေကာင္ေလးကေတာ့ ဓာတ္ပံုေတြကိုမိမိစိတ္တိုင္းက်အေကာင္းဆံုးတည္းၿဖတ္ႏိူင္ပါတယ္ ။ ပန္းခ်ီဆြဲတာ၀ါသနာပါတဲ့ေဘာ္ဒါေတြအတြက္ပါ ပန္းခ်ီဓာတ္ပံုေတြအၿဖစ္ေရးဆြဲတည္းၿဖတ္ႏိူင္ၿပီး မိမိတို႕ရဲ႕
ဓာတ္ပံုေတြကိုလဲ မလိုတာၿဖတ္ လိုတာေတြညွပ္ၿပီးတည္းၿဖတ္ကာမိမိစိတ္ၾကိဳက္စာတန္းေလးေတြလဲေရးထိုး
ႏိူင္ပါေသးတယ္ ။ ဖိုင္ဆိုဒ္က 17mb ရွိၿပီး full ၿဖစ္ေစဖို႕ download file ထဲမွာ Crack file ေလးကိုထည့္
သြင္းေပးထားပါတယ္ ။
GMX-PhotoPainter 2.6.0.466 | 19 MB
Easily Turn your Digital Photos into Paintings! GMX-PhotoPainter is
Perfect for Photographers, Artists, Hobbyists and Students. Choose from
Pen and Ink, Crayon, Oil, Watercolor or Pastel, and Paint like Van Gogh,
Seurat or Matisse. Create your own styles by combining different
brushes, textures and painting techniques, the number of combinations is
endless.How does GMX-PhotoPainter work
As with traditional painting, PhotoPainter paintings are composed of many overlapped brushstrokes. You have the creative freedom to choose and combine your own styles and settings, but at the same time guiding the painting process by automatically choosing the colors and directions of the brushstrokes.
================
[INSTALL NOTES]
================
(1): Please use 7Zip/WinRAR/Universal Extractor to EXTRACT FILES
(2): run the setup
(3): Copy the crack folder content and paste it to the software installed directory.
(4): Enjoy and Support Developers, Buy It, They Deserved It!
★★နည္းပညာၿမိဳ႕ေတာ္★★
Application အမ်ားႀကီးထည့္လို႔ ဖုန္းေလး ေနသူမ်ားအတြက္ App Freeze 8
က်ေနာ့္မွာသံုးေနတဲ့Huawei ဖုန္းတစ္လံုးရွိပါတယ္။
ဟိုစမ္းဒီစမ္းနဲဆိုေတာ့ App ေတြထည့္တာေပါ့။ မ်ားလြန္းေတာ့
ေနာက္ကြယ္ကေနအလုပ္လုပ္တဲ့ Appေတြမ်ားၿပီးခဏခဏCleanလုပ္ေပးေနရပါတယ္။
အဲလိုနဲဟိုတစ္ေနက AppFreezeဆိုတဲ့ေကာင္ေလးစမ္းထည့္လိုက္တာအသစ္အတိုင္းျမန္သြား
ပါတယ္...
အရမ္းေကာင္းလို႔ မွ်ေ၀လိုက္ျခင္းျဖစ္ပါတယ္။
ေအာက္မွာေဒါင္းလုပ္ယူပါ။ အသံုးျပဳနည္းကေတာ့ပထမပံုမွာျပထားတဲ့အတိုင္းEnableမွာသိပ္သံုးေန က် မဟုတ္ေတြ app ေတြ ကို အမွန္ျခစ္ၿပီး ေအာက္က Freeze
ကုိႏွိပ္ပါ။
ထို Freeze လုပ္ထားေသာ (ေအးခဲထားေသာ) Appမ်ားသည္။
လံုး၀အလုပ္မလုပ္ေတာ့ပဲ့ ဒုတိယပံုအတိုင္း Disable မွာ အမွန္ျခစ္ျပန္တပ္၍
ေအာက္က Unfreeze ႏွိပ္မွအသံုးျပဳလိုရပါမယ္။ သေဘာတရားကေတာ့ အသံုးမလိုတဲ့ app
ေတြကို Uninstall လုပ္စရာမလိုပဲ Freeze လုပ္ထားျခင္းျဖင့္
ဖုန္းကိုလွ်င္ျမန္သြက္လက္ေပါ့ပါးေစမွာျဖစ္ပါတယ္။ ဖိုင္းဆိုဒ္ ေတာ့သိပ္ျပီးမၾကီးပါ
3.2MBသာရွိပါတယ္
Zoom Player MAX 9.3.0 Final With Crack Full Version
ဒီေကာင္ေလးကေတာ့ operating systems Windows ေတြအတြက္ DVD ႏွင့္ media player ေတြမွာ
full-screen mode, zoom, widescreen video အျပည့္ၾကည့္ႏိုင္ျပီးဘာေဘာင္အမည္းေတြမွမရွိပဲ
အျပည့္ၾကည့္ႏိုင္တဲ့ Inmatrix Zoom Player ေလးပဲျဖစ္ပါတယ္။skins ကိုၾကိဳက္တဲ့အေရာင္ေျပာင္းႏိုင္
ျပီး Unicode Supportလုပ္ေပးပါတယ္။Full ျဖစ္ေစဖို႔အတြက္ Crack ဖိုင္ေလးကိုထည့္ေပးထားပါတယ္။
Zoom Player - the most powerful, flexible and customizable DVD and media player for operating systems Windows. The program supports playlists, management hot keys, full-screen mode, zoom, widescreen video to remove the bands top and bottom of the screen, several types of interface and its variation with the skins. Zoom Player MAX is the most functional version of the program, is aimed at the most demanding users and offers maximum flexibility and customization.
Key features:
• Play DVD movies
• Select from a variety of DVD audio and video decoders for improved compatibility and reliability
• DVD playback from hard drive, USB drive, etc.
• Parental control with password protection watch DVD
• Play Broken AVI files
• Removing and playback of archived files
• Support for Windows Media DRM
• Powerful playlist manager
• Support for various media formats
• Built-in 10-band equalizer with presets
• Easy access to most of the interfaces of audio and video filters
• Unicode Support
• Extensive command line support
• Support for skins Interface
Supported Media Formats:
Video:
DVD, BluRay (Decrypted main movie playback with subtitles), AVI, QuickTime (MOV / HDMOV), XVID, DIVX, Windows Media (WMV / ASF), Flash Video (FLV), Flash (SWF), Cellphone 3GPP (3GP/3G2 ), CamCorder (MOD / TOD), Ogg Movie (OGM), Theora (OGV), Real Media (RM / RMVB), VideoCD (VCD), Super VideoCD (SVCD), MPEG (MPG), MPEG2 Program (M2V/VOB / MOD), MPEG2 Transport (TS/TP/TSP/TRP/M2T/M2TS/MTS/PVA/TOD), MPEG4 (SP / ASP), H.264 (MPEG4 AVC), MPEG4 ISO (MP4), Matroska (MKV ), Media Center DVR (DVR-MS), VP3, VP6, VP7, Digital Video (DV), Motion JPEG (MJPEG), FLIC (FLI / FLC).
Audio:
MP3, Windows Media (WMA), Advanced Audio Coding (AAC), OGG Vorbis (OGG), Free Lossless Audio CODEC (FLAC), CD-Audio (CDA), Dolby Digital (AC3), Cell Phone (AMR), Digital Theatre Surround (DTS), LPCM, Monkey Audio (APE), Real Media (RA), MusePack (MPC), OptimFROG (OFR), Shorten (SHN), True Audio (TTA), WavPack (WV), Apple Lossless Audio Coding ( ALAC), MIDI, Matroska (MKA), Wave Audio (WAV), SHOUTcast (Streaming), AIFF, MO3, IT, XM, S3M, MTM, UMX.
Image:
JPEG (JPG), PNG, GIF, BMP, ICO, WMF, EMF, JFIF, RLE, WIN, VST, VDA, TGA, ICB, TIFF, FAX, EPS, PCX, PCC, SCR, RPF, RLA, SGI, BW , PSD, PDD, PPM, PGM, PBM, CEL, PIC, PCD, CUT, PSP, PN.
Interactive:
DVD, Hypertext Markup Language (HTML), Flash (SWF).
Windows 2000, XP, Vista, 7 and 8
full-screen mode, zoom, widescreen video အျပည့္ၾကည့္ႏိုင္ျပီးဘာေဘာင္အမည္းေတြမွမရွိပဲ
အျပည့္ၾကည့္ႏိုင္တဲ့ Inmatrix Zoom Player ေလးပဲျဖစ္ပါတယ္။skins ကိုၾကိဳက္တဲ့အေရာင္ေျပာင္းႏိုင္
ျပီး Unicode Supportလုပ္ေပးပါတယ္။Full ျဖစ္ေစဖို႔အတြက္ Crack ဖိုင္ေလးကိုထည့္ေပးထားပါတယ္။
Zoom Player - the most powerful, flexible and customizable DVD and media player for operating systems Windows. The program supports playlists, management hot keys, full-screen mode, zoom, widescreen video to remove the bands top and bottom of the screen, several types of interface and its variation with the skins. Zoom Player MAX is the most functional version of the program, is aimed at the most demanding users and offers maximum flexibility and customization.
Key features:
• Play DVD movies
• Select from a variety of DVD audio and video decoders for improved compatibility and reliability
• DVD playback from hard drive, USB drive, etc.
• Parental control with password protection watch DVD
• Play Broken AVI files
• Removing and playback of archived files
• Support for Windows Media DRM
• Powerful playlist manager
• Support for various media formats
• Built-in 10-band equalizer with presets
• Easy access to most of the interfaces of audio and video filters
• Unicode Support
• Extensive command line support
• Support for skins Interface
Supported Media Formats:
Video:
DVD, BluRay (Decrypted main movie playback with subtitles), AVI, QuickTime (MOV / HDMOV), XVID, DIVX, Windows Media (WMV / ASF), Flash Video (FLV), Flash (SWF), Cellphone 3GPP (3GP/3G2 ), CamCorder (MOD / TOD), Ogg Movie (OGM), Theora (OGV), Real Media (RM / RMVB), VideoCD (VCD), Super VideoCD (SVCD), MPEG (MPG), MPEG2 Program (M2V/VOB / MOD), MPEG2 Transport (TS/TP/TSP/TRP/M2T/M2TS/MTS/PVA/TOD), MPEG4 (SP / ASP), H.264 (MPEG4 AVC), MPEG4 ISO (MP4), Matroska (MKV ), Media Center DVR (DVR-MS), VP3, VP6, VP7, Digital Video (DV), Motion JPEG (MJPEG), FLIC (FLI / FLC).
Audio:
MP3, Windows Media (WMA), Advanced Audio Coding (AAC), OGG Vorbis (OGG), Free Lossless Audio CODEC (FLAC), CD-Audio (CDA), Dolby Digital (AC3), Cell Phone (AMR), Digital Theatre Surround (DTS), LPCM, Monkey Audio (APE), Real Media (RA), MusePack (MPC), OptimFROG (OFR), Shorten (SHN), True Audio (TTA), WavPack (WV), Apple Lossless Audio Coding ( ALAC), MIDI, Matroska (MKA), Wave Audio (WAV), SHOUTcast (Streaming), AIFF, MO3, IT, XM, S3M, MTM, UMX.
Image:
JPEG (JPG), PNG, GIF, BMP, ICO, WMF, EMF, JFIF, RLE, WIN, VST, VDA, TGA, ICB, TIFF, FAX, EPS, PCX, PCC, SCR, RPF, RLA, SGI, BW , PSD, PDD, PPM, PGM, PBM, CEL, PIC, PCD, CUT, PSP, PN.
Interactive:
DVD, Hypertext Markup Language (HTML), Flash (SWF).
Windows 2000, XP, Vista, 7 and 8
Subscribe to:
Posts (Atom)